
Table of Contents
Equipboard
Equipboard is the world's largest community of artists and their gear. Read our review process.
We are reader-supported. When you buy through links on our site, we may earn an affiliate commission. Learn more.
Every good drummer eventually understands that great sound starts with proper tuning. Whether you're playing in a garage band or recording in a professional studio, the way your drums are tuned shapes your entire sound. In this comprehensive guide, we'll explore the fundamentals of drum tuning, from basic concepts to advanced techniques that will help you achieve the perfect tone for any musical situation.
A properly tuned kit does more than just sound good - it can enhance your playing dynamics, improve recording quality, and boost your confidence behind the kit. Many drummers, especially beginners, often overlook the importance of tuning, focusing instead on technique and gear. However, even the most expensive drum kit will sound mediocre if it's poorly tuned.
We'll walk through everything you need to know about drum tuning, including essential tools, step-by-step techniques, and solutions to common tuning problems. You'll learn how to tune each drum in your kit, understand the relationship between batter and resonant heads, and discover how to achieve specific sounds for different musical styles.
Anatomy of a Drum
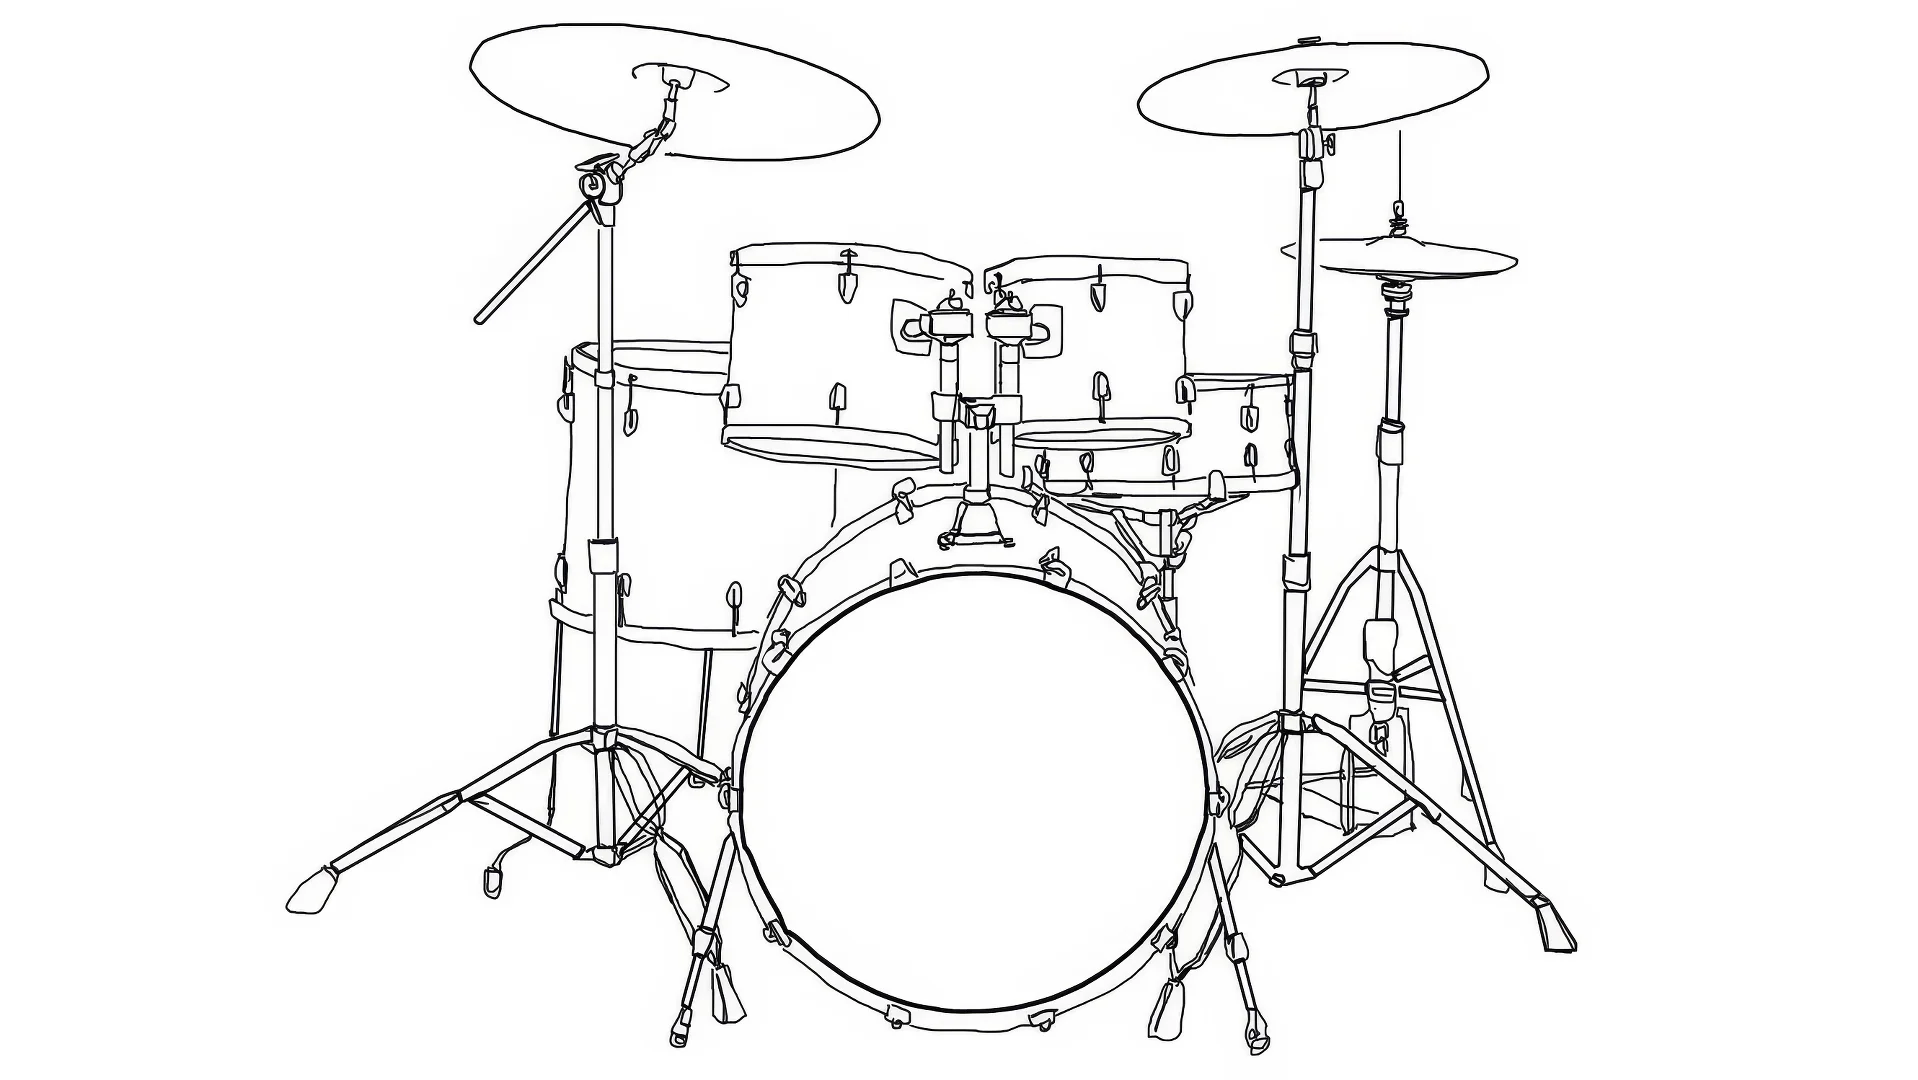
Before diving into tuning techniques, let's understand the parts of a drum that affect its sound. Each component plays a crucial role in how your drum will respond to tuning.
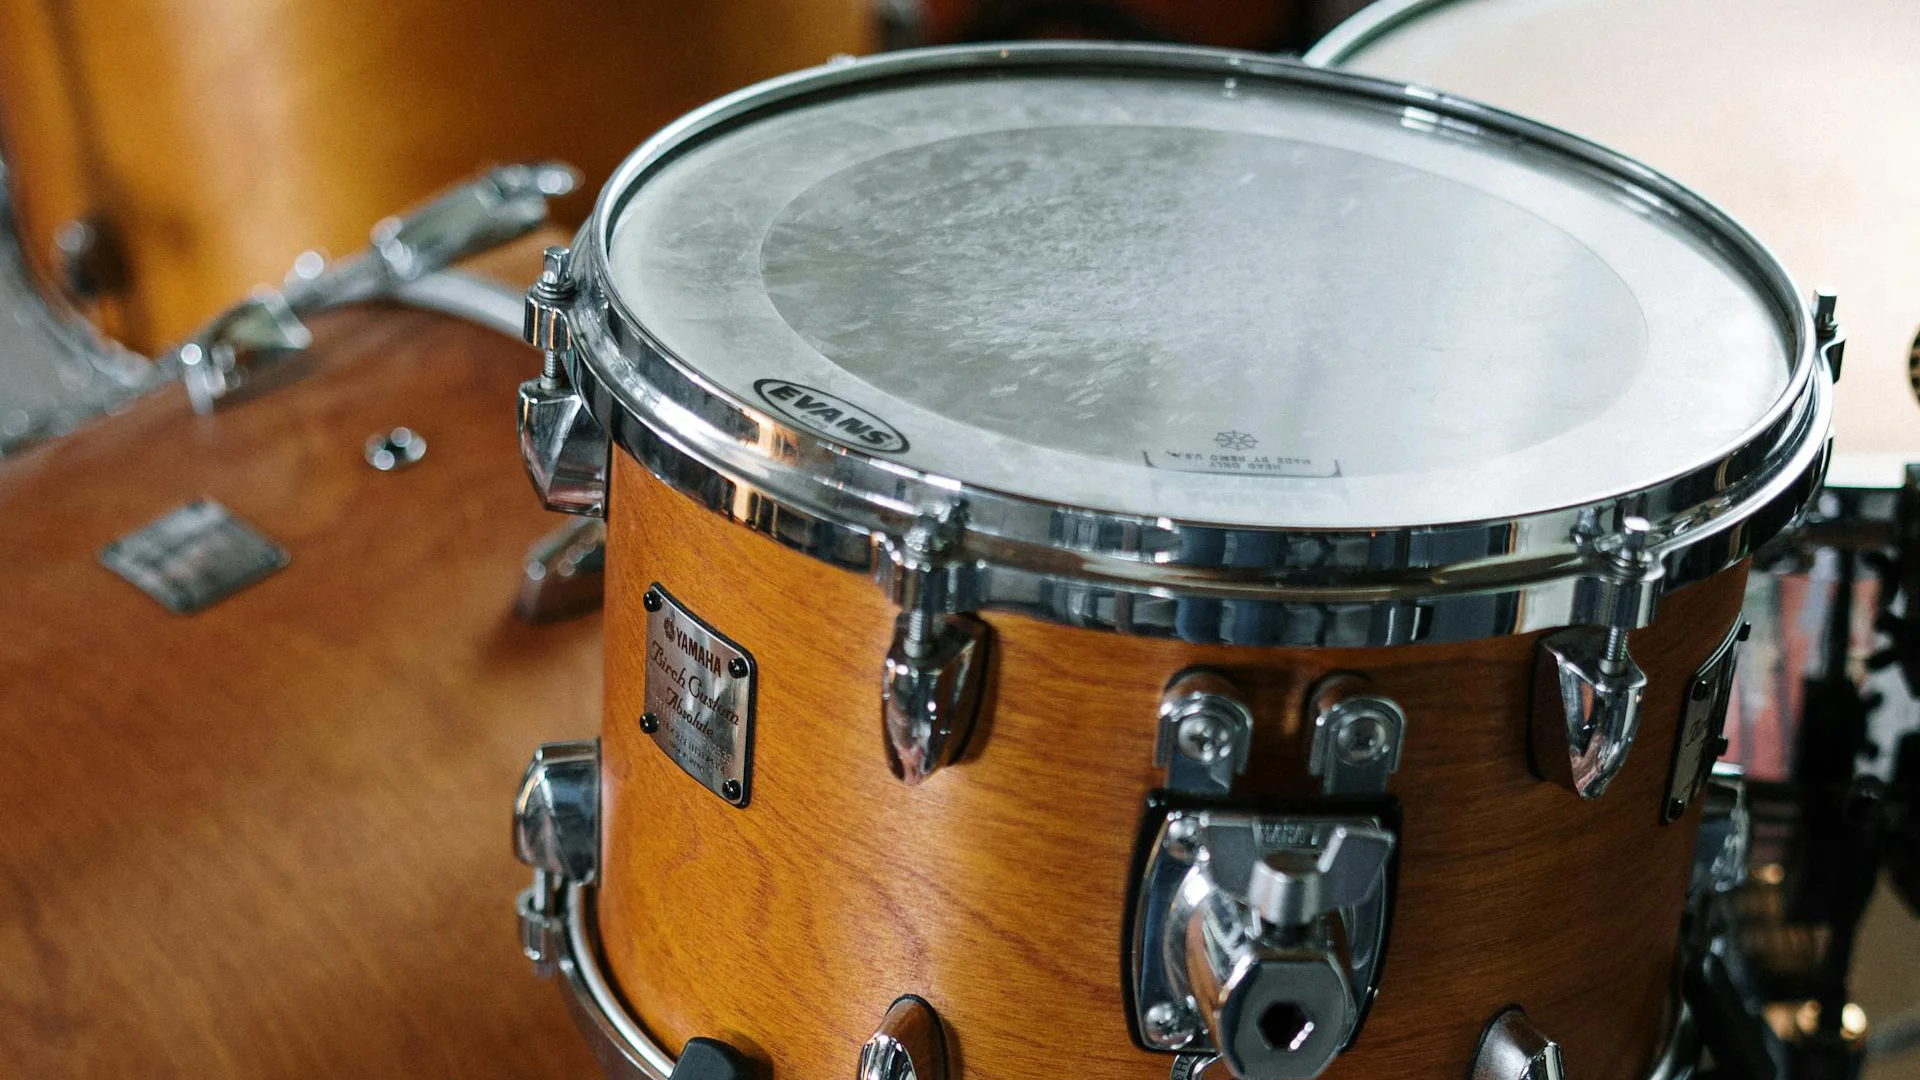
The Shell
The main body of the drum, or shell, forms the foundation of your drum's sound. Different shell materials create distinct tonal characteristics:
• Maple shells provide warm, balanced tones with strong mid-frequencies • Birch offers brighter attack with enhanced high and low frequencies • Mahogany produces deep, dark tones with emphasized low-end • Metal shells (like brass or aluminum) typically deliver bright, projecting sounds with lots of attack
The Heads
Most drums use two heads:
- The batter head sits on top - this is the one you hit
- The resonant head (or reso head) sits on the bottom
These heads work together to create your drum's voice. Think of them like the strings of a guitar - changing the tension of either head affects the overall sound.
Bass drums are often configured differently - many modern players use only a batter head with a small port in the front head, or remove the front head entirely for a more controlled sound. This helps achieve the punchy, focused sound common in contemporary music.
The Bearing Edge
The bearing edge is the critical point where your drum head meets the shell. This precisely cut edge determines how the head vibrates and significantly affects your drum's sustain and overtones. Modern drums typically use 45-degree bearing edges, which provide focused tone and good projection. Rounder bearing edges (common in vintage-style drums) create warmer tones with less attack. Any damage to this edge will prevent proper head seating and tuning.
Hoops and Hardware
The metal hoops (or rims) clamp your drum heads to the shell. The tension rods thread into metal casings called lugs, which are mounted on the shell. Most drums have 6-10 lugs per head. These components work together to maintain even tension across your drum head.
How Your Drum Makes Sound

Understanding how a drum creates sound will help you make better tuning decisions. Let's look at how all those parts we just discussed work together.
The Basic Sound Process
When you strike the batter head, it creates a vibration that travels through the drum. This vibration bounces between both heads, moving through the air inside the shell. The resonant head responds to these vibrations, and both heads work together to create your drum's voice. Think of it like tossing a ball between two trampolines - the tension of each surface affects how the ball bounces.
The Role of Tension
Each head's tension determines its pitch, much like a guitar string. Higher tension means higher pitch. But here's what makes drums unique: you're dealing with two heads that interact with each other. The relationship between both their tensions shapes your overall sound. When both heads are tuned to similar tensions, they resonate together to create a clear, strong note.
Shell Contribution
While the heads create most of the sound, your shell adds its own character. A shell's size and material affect which frequencies it naturally amplifies or reduces. Larger shells favor lower frequencies, while smaller shells emphasize higher ones. This natural tendency should guide your tuning choices - don't fight against your drum's natural voice.
Understanding Overtones
Beyond the main note (called the fundamental), drums produce additional tones called overtones. These overtones give each drum its distinctive character. While some overtones are desirable, too many can make your drum sound unclear or ringy. Good tuning helps control these overtones without eliminating the ones that add richness to your sound.
Basic Principles of Drum Tuning
Understanding how to approach drum tuning will save you hours of frustration. While each drum is unique, these fundamental principles apply to tuning any drum in your kit.
Thinking About Pitch
Most drums sound best within a natural range that suits their size. A larger drum naturally wants to produce lower notes, while smaller drums favor higher pitches. A 16-inch floor tom trying to match the pitch of a 10-inch rack tom will sound strained and lose its warmth. Similarly, a small tom tuned too low will sound muddy and lack definition.
Head Tension Relationships
The relative tension between your batter and resonant heads drastically affects your sound:
Equal tension produces maximum resonance with clear pitch. The heads vibrate in sync, creating strong sustain and a pure fundamental note. This tuning typically works well for toms in most musical styles.
A tighter resonant head gives less sustain but more attack. The initial hit has more impact, making this approach popular for recording situations or when you need a more controlled sound. Many rock drummers prefer this setup for their snare drums.
A looser resonant head creates more sustain and a deeper tone. The note tends to bend slightly after the initial hit, producing a subtle pitch drop that many jazz drummers favor. This tuning lets the drum "breathe" more but can be harder to control in louder settings.
The Importance of Even Tension
Uneven tension is the most common cause of tuning problems. When lugs have different tensions, the head can't vibrate uniformly. This creates interference patterns that result in unclear pitch, unwanted overtones, and that dreaded "basketball" sound. A drum with even tension will produce a clear note and consistent response across the entire head.
Understanding Pitch vs. Sound
Your goal isn't to tune to specific notes, but to find where each drum sounds its best naturally. Consider these factors:
- Resonance: The drum should vibrate freely without choking
- Clarity: The fundamental pitch should be easy to hear
- Attack: The initial hit should feel comfortable and sound clear
- Decay: The sound should fade naturally without strange fluctuations
Some drums might sound better slightly detuned from a "perfect" pitch if it makes them sit better in the mix with your other drums.
Tools and Setup for Tuning

Before you start adjusting lugs, you need the right tools and proper setup. Having the correct equipment and environment makes the difference between a frustrating experience and a successful tuning session.
The Essential Tools
A quality drum key is your most crucial investment. While they may look similar, a well-made drum key provides better feel and won't strip your tension rods. Look for one with a comfortable grip and smooth turning action. The standard drum key works for most situations, but some drummers prefer specialized versions like speed keys for faster adjustments or torque keys for consistent tension.
Here are a few drum keys you can check out
- Remo Quicktech Drum Key
- Evans Magnetic Head Drum Key
- Roland Drum Key RDK-1
- Meinl Black Nickel Kinetic Drum Key
Beyond the drum key, you'll want:
- A clean cloth for wiping down bearing edges
- A flashlight for inspecting edges and hardware
- A flat surface to work on (avoid carpet or soft flooring)
- Basic cleaning supplies for removing dirt and grime
Creating the Right Environment
Your tuning environment significantly affects your ability to hear subtle pitch differences. Find a quiet space with minimal background noise and good lighting. Position your drum at a comfortable height - usually about waist level when seated. A drum throne or sturdy chair lets you move around the drum easily while maintaining consistent height.
Preparation Steps
Before touching a tension rod, inspect your drum thoroughly:
Remove the head if you're doing a complete retuning. Check the bearing edge for any nicks, dents, or uneven spots. Run your finger around it - you should feel a smooth, consistent surface.
Clean all parts that contact the head: bearing edges, hoops, and the head collar itself. Even small debris can affect how evenly the head seats.
The Basic Tuning Process

Now that we understand the fundamentals and have our tools ready, let's walk through the actual process of tuning a drum. This method works for any drum in your kit, though we'll cover specific adjustments for different drums later.
Starting From Zero
Always begin with a completely loose head unless you're making minor adjustments. Remove the old head and clean everything thoroughly. When seating the new head, align it carefully on the bearing edge before placing the hoop. Hand-tighten each tension rod until you feel light resistance - this ensures the head is making even contact all around.
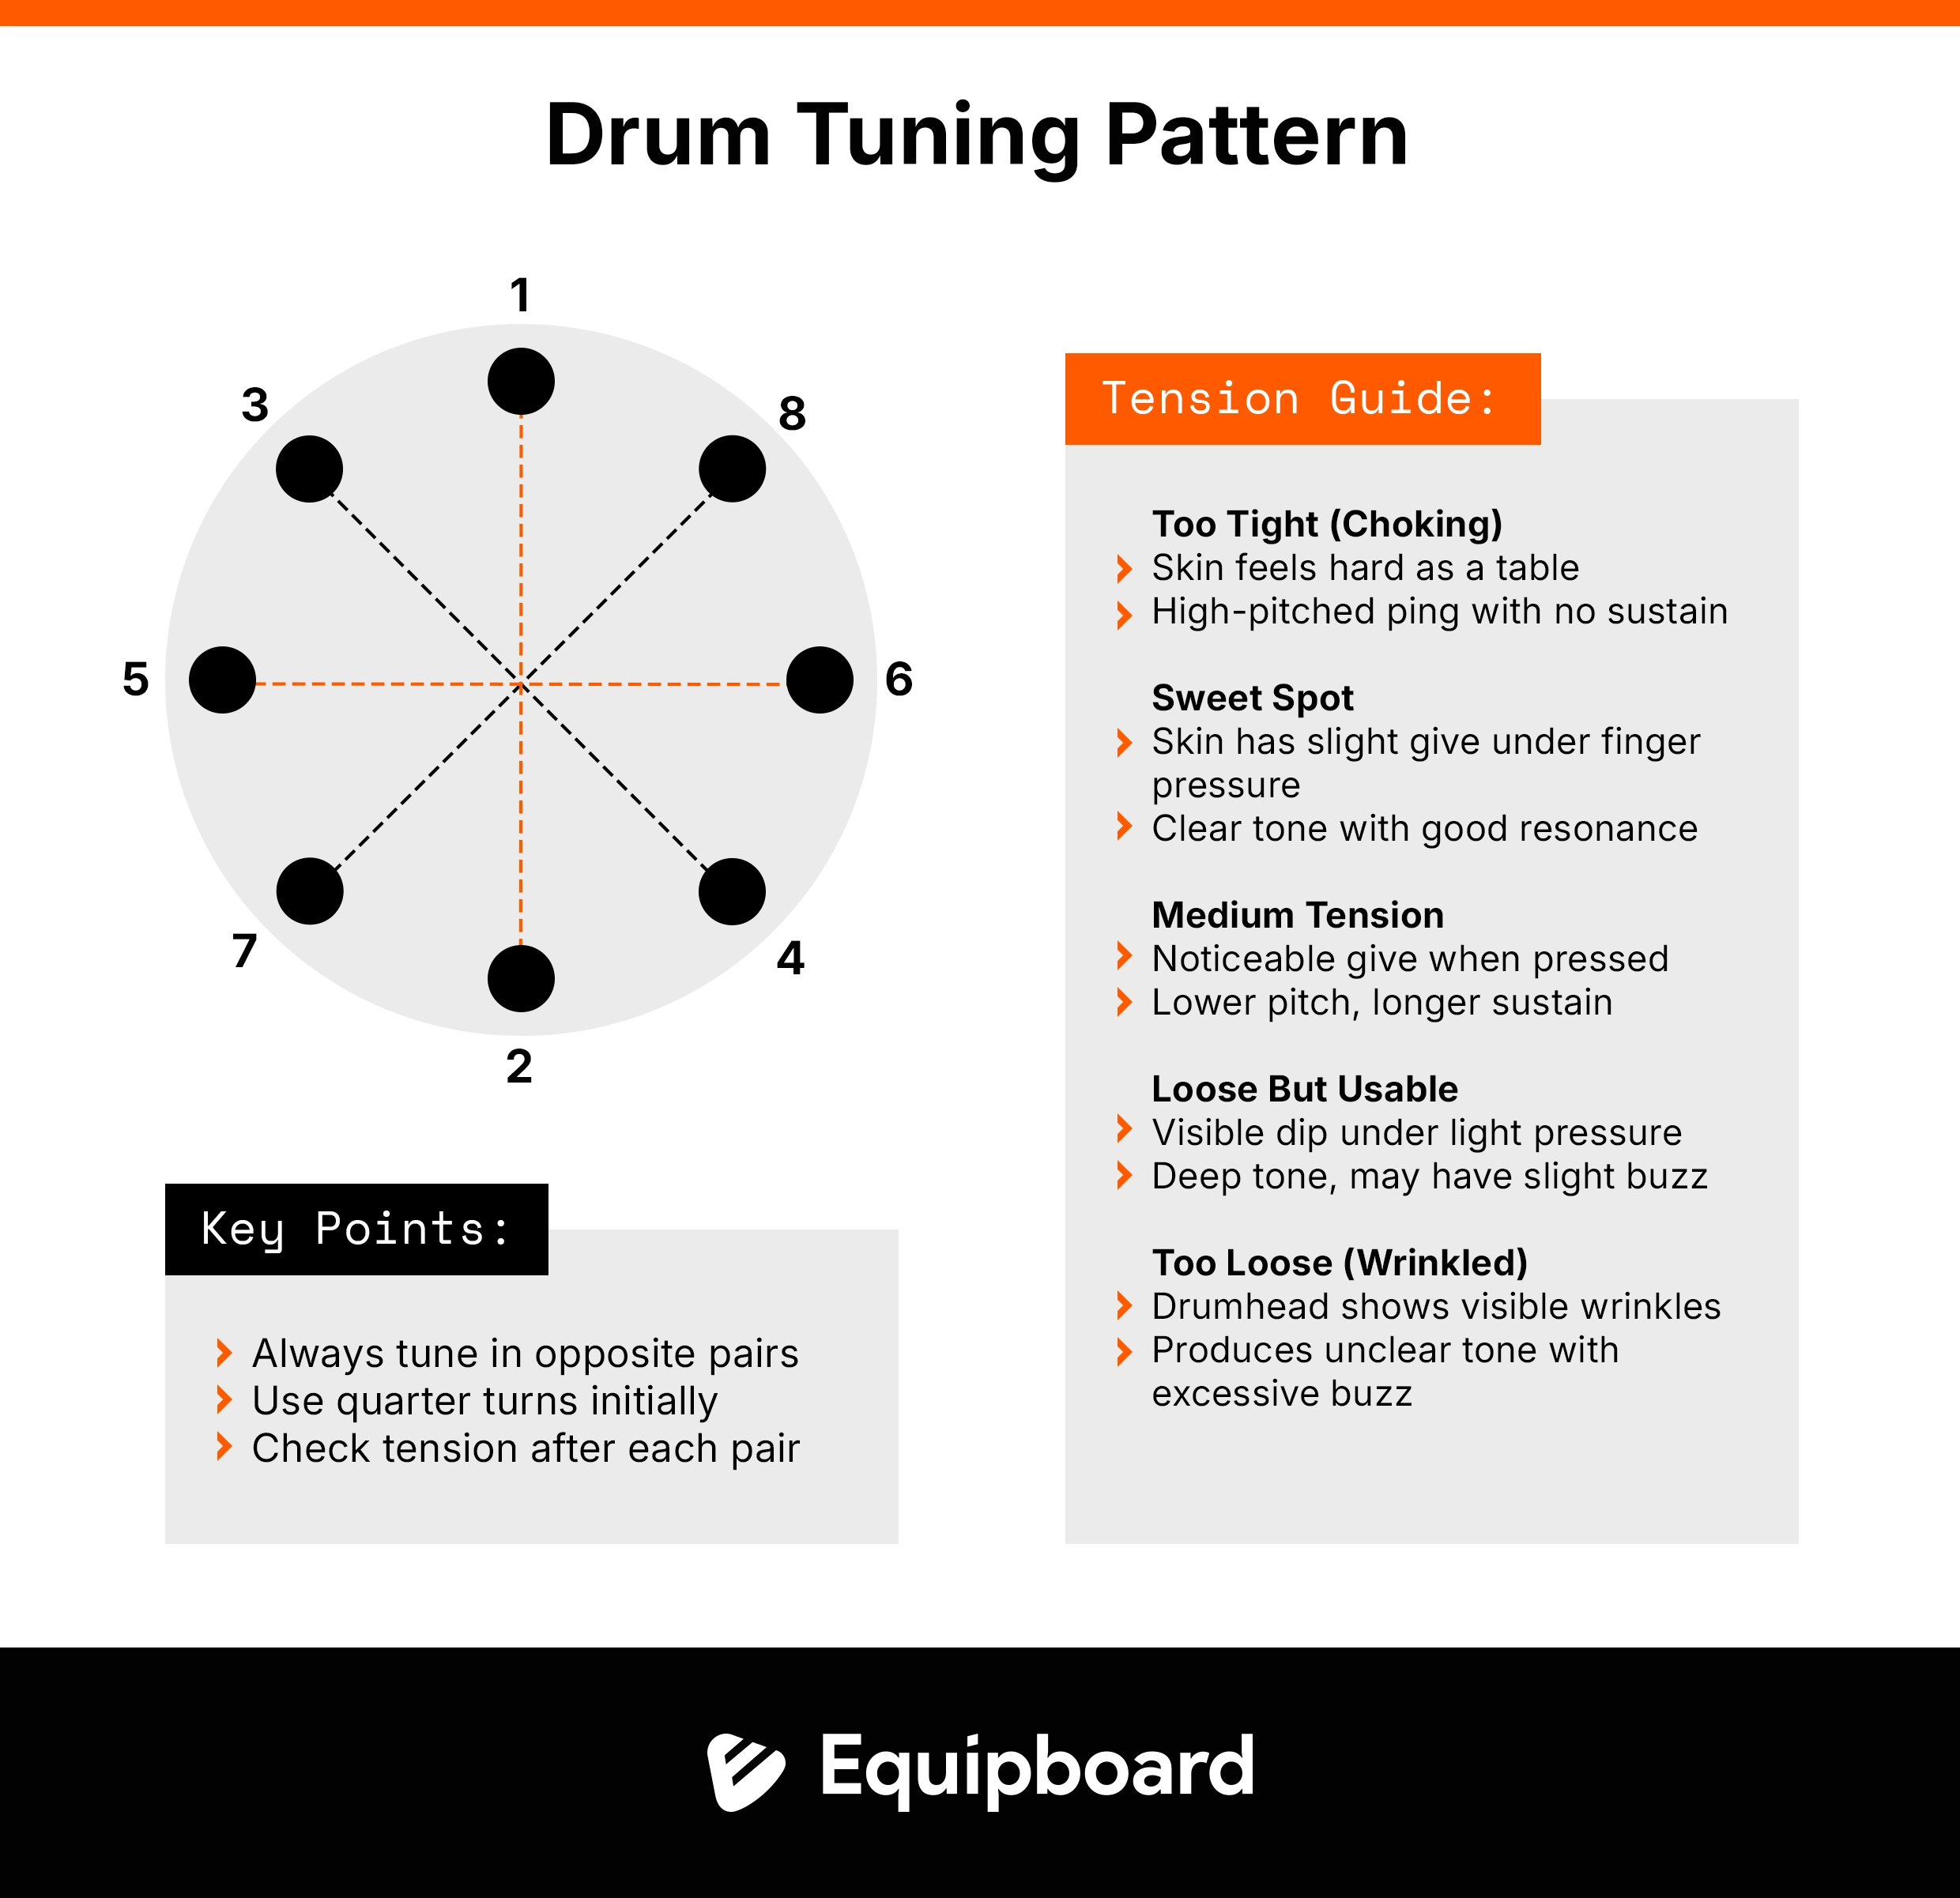
The First Turns
Start with one lug and get the tension rod finger-tight (don’t use the drum key yet). Move directly across the drum and do the same with the opposite lug. Continue this pattern of opposite pairs until all lugs are finger-tight. This opposite-lug technique, often called the star pattern, is crucial for even tension.
Building Tension
Using your drum key, make small, equal adjustments following the same star pattern. A quarter turn is plenty at this stage. Listen for a slight change in pitch as you tap near each lug - about an inch from the edge. If one spot sounds notably different from the others, you've likely turned that lug too far.
Finding Your Sound
Once you have even tension, focus on achieving your desired pitch and tone. Tap the center of the head - this reveals your fundamental note. Tap near each lug - these should produce consistent pitches. If you hear wavering or uneven tones, return to the evening-out process.
Fine-Tuning and Troubleshooting
Even after following the basic tuning steps, you might encounter some common issues. Here's how to identify and fix them while fine-tuning your sound.
Common Issues and Solutions
The most frequent problem is the "warble" - a wavering sound that indicates uneven tension. To fix this, tap about an inch from each lug while listening carefully. Usually, one or two spots will sound different. Make tiny adjustments (less than a quarter turn) until the pitches match.
Strange overtones often signal a head that isn't properly seated. If you hear odd ringing even with even tension, slightly loosen all lugs and press firmly in the center of the head. Retune from this point, making sure to maintain even pressure as you go.
Perfecting Your Sound
A drum at optimal tension will produce clear pitch when struck anywhere on the head. Listen for a smooth decay - the sound should fade naturally without fluctuating. Use small, incremental adjustments when fine-tuning. At this stage, a sixteenth turn can make a noticeable difference.
Using Dampening Effectively
Dampening means reducing unwanted vibrations or overtones in your drum sound. Think of it like putting your hand on a ringing bell - it controls how long and how intensely the sound continues. Common dampening tools include moongels (small sticky gel pads), control rings (plastic rings that sit on your drum head), or even simple strips of tape.
Dampening affects two main aspects of your drum sound:
- How long the drum rings (sustain)
- How many additional frequencies you hear beyond the main note (overtones)
Many drummers make the mistake of using dampening to fix tuning problems. If your drum has an unclear tone or strange buzzing, that's usually a tuning issue, not a need for dampening. A well-tuned drum should sound good on its own, with dampening used only for fine-tuning the sound.
For example, you might add a small piece of moongel to reduce ring for recording, or use a control ring on your floor tom to tighten up its sound for rock music. The key is using just enough dampening to shape your sound, not mask tuning problems.
Maintaining Your Tune
Once you've achieved your desired sound, make a mental note of how the drum feels and sounds. Regularly check your tuning by tapping around the head - you'll start recognizing when it needs adjustment.
Tuning Specific Drums

Each drum in your kit serves a unique purpose and requires a slightly different approach to tuning. Let's explore how to get the best sound from each drum.
Snare Drum Tuning
The snare drum is often called the heart of your kit, and its tuning can make or break your overall sound. Unlike other drums in your kit, the snare requires tuning three separate components: the batter head, the resonant head, and the snare wires themselves.
Start with the resonant (bottom) head - it typically needs higher tension than the batter head. A tight resonant head helps create that characteristic snare response. The tension of this head directly affects how your snare wires respond.
For the batter head, find a balance between response and tone. Most drummers tune the batter head medium-tight to tight. Too loose, and you'll lose sensitivity; too tight, and you'll lose body in your sound. The snares themselves should be adjusted last - tight enough to respond to soft hits but not so tight that they buzz on striking the other drums.
Tom Tuning
The key to great-sounding toms is their relationship to each other. Start with your middle tom as a reference point. Once you've got it sounding good, tune your other toms in relation to it. Keep larger toms lower in pitch and smaller toms higher.
For each tom, tune the resonant head slightly higher than the batter head. This gives you good stick response while maintaining roundness in the tone. Avoid tuning toms too far apart in pitch - they should flow naturally from high to low.
Bass Drum Tuning
Bass drums need a different approach. They generally sound best with the batter head tuned looser than the resonant head. Start with moderate tension on the resonant head - just tight enough to hold its shape. The batter head should have just enough tension to prevent wrinkles when struck.
Most modern bass drum sounds use some form of dampening. Start with minimal dampening and add more if needed - you can always make your drum more dry, but finding the right fundamental tone first is crucial.
Tuning for Different Musical Styles

Different genres demand different sounds from your drums. Understanding these characteristics helps you adjust your tuning to suit any musical context.
Rock and Metal
Rock drumming demands punchy, controlled sounds. Tune your toms slightly lower than you might expect, with minimal sustain. This prevents the sound from getting muddy in high-volume situations. The snare drum typically wants a medium-high tuning to cut through distorted guitars.
For metal specifically, consider higher tension on your bass drum batter head. This provides the attack needed for fast kick patterns while maintaining power. The snare often benefits from extra tension on both heads to achieve that signature crack.
Jazz
Jazz requires more resonance and sustain. Let your drums breathe by tuning both heads to similar tensions. Higher tuning overall helps achieve that classic jazz sound, but don't go so high that you lose warmth. Your ride cymbal should be the brightest voice in the kit.
The bass drum in jazz wants more tone and less attack. Keep both heads at medium tension and use minimal or no dampening. Your snare should be responsive enough for ghost notes while maintaining body for cross-stick playing.
Studio Recording
Recording requires the most controlled approach to tuning. Start with slightly higher tension than you might use live - drums often sound looser on recordings. Remove or minimize any unwanted overtones, as microphones will amplify these more than your ears do in a room.
Consider tuning your toms to specific intervals (we’ll talk about this in detail later) if you're recording melodic tom parts.
Remember that studio tuning might feel slightly different under your sticks - take time to adjust your playing accordingly.
Live Performance
Live tuning needs to account for room acoustics and volume levels. Larger venues often benefit from more dampening and controlled sustain. Your drums should project clearly without overwhelming the mix. Consider slightly higher tension on all drums to help them cut through.
Maintaining Your Drum Tuning
Good tuning isn't a one-time thing - it requires regular attention and maintenance. Understanding how to maintain your tune will save you time and ensure consistent sound from gig to gig.
Regular Maintenance
Check your tuning before every significant playing session. Temperature changes, humidity, and regular playing can all affect head tension. A quick check only takes a few minutes and can prevent tuning problems during performance.
Listen for any unusual changes in sound while playing. A drum that suddenly develops strange overtones or loses its tone likely needs adjustment. Make small corrections as soon as you notice issues rather than waiting for a complete retuning.
Head Life and Replacement
Drumheads gradually lose their ability to hold tension and produce optimal tone. Watch for signs of wear like dents that don't bounce back, cloudiness in clear heads, or loss of coating. A head that won't hold its tuning despite proper technique usually needs replacement.
Consider changing heads before major recording sessions or important performances. New heads, properly tuned and played for a few hours to settle in, will give you the best possible sound.
Environmental Factors
Temperature and humidity significantly affect drum tuning. Store your kit in a climate-controlled space when possible. If you're playing outdoors or in varying conditions, expect to make more frequent adjustments. Extreme temperature changes can require complete retuning.
Transport and Storage
Drums can lose their tuning during transport. Invest in quality cases and avoid stacking heavy items on your drums. When storing drums long-term, maintain light tension on the heads - not completely loose, but not fully tuned either.
Advanced Tuning Techniques and Troubleshooting

Even experienced drummers encounter complex tuning challenges. These advanced techniques can help you solve tricky tuning issues and fine-tune your sound with greater precision.
Interval Tuning
Understanding musical intervals can transform your tom sound. When toms are tuned to specific musical intervals, they create a melodic sequence - like notes on a piano. This means each tom produces a specific musical note when struck. For example, you might tune your high tom to the note G, your middle tom to D, and your floor tom to A. These notes form a musical relationship that's pleasing to the ear.
This approach is particularly useful when:
• You're playing tom fills that need to complement the song's key • Recording parts where your toms are a melodic element, not just rhythmic • Creating dramatic descending fills that need to sound musical
Think of it like tuning a guitar - each string has a specific note, and they work together to create harmony. Similarly, your toms can work together to create melodic patterns rather than just rhythmic ones.
A common tuning interval is a perfect fourth - imagine the first two notes of "Here Comes the Bride" - that's a perfect fourth. Another popular choice is tuning in fifths, like the first two notes of the "Star Wars" theme.
Resonant Head Fine-Tuning
While we previously covered basic resonant head tuning, advanced techniques involve minute adjustments. Start by getting your batter head exactly where you want it. Then, make tiny adjustments to the resonant head - sometimes as little as an eighth turn. Listen for the "sweet spot" where the fundamental note jumps out clearly.
Pitch-Matching Techniques
Learn to match pitches by ear for more precise tuning. Hum or sing the note you hear when striking the drum. If the pitch wavers, you've found an uneven spot. This technique becomes particularly useful when tuning drums to specific notes for recording.
Problem-Solving
Here's how to address some complex tuning issues:
False notes - spots where the pitch differs from the rest of the head: Check for stretched or damaged areas on the head. Sometimes, redistributing tension to adjacent lugs can help.
Excessive sustain that muddies your sound: Rather than reaching for dampening, try slightly detuning one head. This controlled tension mismatch can reduce problematic overtones while maintaining tone.
Drums - A Different Kind of Tuning
Unlike stringed instruments, drums produce complex sounds that don't always translate to specific musical notes. When you strike a guitar string, it vibrates at a consistent frequency, producing a clear, definable pitch. A drum, however, produces multiple frequencies simultaneously due to the interaction between two heads and the shell.
The Complexity of Drum Sound
When you hit a drum, several things happen at once:
- The batter head produces its own pitch
- The resonant head creates another pitch
- The shell adds its own resonant frequencies
- All these elements interact to create overtones
This means that while you can tune a drum "higher" or "lower," getting it to match an exact musical note can be challenging and isn't always desirable.
Frequently Asked Questions
How often should I tune my drums?
Check your tuning before every major performance or recording session. However, the frequency of full retuning depends on several factors: how often you play, how hard you hit, and your environment. A good rule of thumb is to do a complete retuning every 4-6 weeks if you're playing regularly. Don't wait until your drums sound noticeably off - regular maintenance prevents major tuning issues.
Why does my snare drum buzz when I hit my toms?
This common issue, called sympathetic vibration, happens when your snare wires vibrate in response to other drums' frequencies. Start by checking your snare wire tension - they might be too loose. If the problem persists, try slightly adjusting your tom tuning, particularly the floor tom. Sometimes, a small change in tom pitch can significantly reduce snare buzz without compromising your overall sound.
Do I really need to tune both heads?
Yes, absolutely. Both heads contribute to your drum's overall sound, even if you can't see the resonant head. Think of it like a partnership - one head affects how the other responds. While some drummers remove the resonant head for specific sounds (especially on bass drums), a properly tuned two-headed drum will generally give you more tonal options and better resonance.
My drums sound great at home but terrible at gigs. Why?
Room acoustics play a huge role in how your drums sound. What works in your practice space might need adjustment in different venues. Consider keeping your drums slightly tighter for live situations, as larger rooms often add their own resonance. Also, remember that drums often sound different from the audience's perspective than from behind the kit.
How do I know when to replace my drumheads?
Look for these signs that a head needs replacement: dents that don't bounce back, coating wearing away unevenly, or difficulty maintaining consistent tuning. A clear head turning cloudy or showing stress marks near the edges is also a sign it's time for a change. Generally, batter heads need replacement more frequently than resonant heads - typically every 3-6 months for regular players.
What exactly is dampening and when should I use it?
Dampening controls unwanted overtones and excessive ring in your drums' sound. Think of it like a volume control for specific frequencies. There are several ways to dampen drums: moongels (removable sticky pads), control rings (plastic rings that sit on the head), felt strips, or even just a piece of gaffer tape. The key is understanding that dampening should refine your sound, not fix poor tuning.
Conclusion
Like any musical skill, drum tuning is an art that develops with practice. While this guide provides a comprehensive framework, developing your ear and understanding your own kit will ultimately lead you to your signature sound.
Key Points to Remember
Start with the basics - even tension and proper technique form the foundation of good tuning. Take time to understand how your drums respond to different tuning approaches. Each kit has its own character, and learning to work with these natural tendencies will help you achieve better results.
Building Your Skills
Don't be afraid to experiment once you've mastered the fundamentals. Try different head combinations, tuning relationships, and tension levels. Record yourself playing to hear how your tuning choices affect your overall sound in different contexts.
Final Thoughts
Remember that there's no single "perfect" tuning - the best sound is the one that works for your music and playing style. Trust your ears above any rules or guidelines. Keep these techniques in your drumming toolbox, but let your musical judgment be the final arbiter of your sound.
The time you invest in learning proper tuning techniques will pay dividends in every aspect of your playing.
Top Ranked Drum Set Accessories on Equipboard


About the authors
S. Jino is an accomplished multi-instrumentalist and music producer based in Kolkata, India, distinguished by his self-taught mastery and unique blend of technical acumen and musical performance. His extensive experience was forged through hands-on dedication, starting with the full restoration of a broken guitar. Jino's capabilities span keyboards, pedals, and advanced digital production, reflecting a comprehensive skill set developed independently. As a significant contributor to the music scene, Jino regularly performs with worship bands and college ensembles. He has also established himself as a reliable and authoritative professional in freelance mixing, mastering, and original music creation. Inspired by the innovative sounds of Brian May and David Gilmour, and influenced by Kolkata's vibrant metal community, Jino is committed to the intricate art of vintage gear restoration and the continuous exploration of music and technology fusion. His current professional setup, featuring a meticulously restored nameless guitar, a Fender Player Strat, and a Boss Katana 50. Read more


.webp)