From Noise to Nirvana: The Complete Room Soundproofing Bible

By Gear Experts
By Gear Experts
Table of Contents
Equipboard
Equipboard is the world's largest community of artists and their gear. Read our review process.
We are reader-supported. When you buy through links on our site, we may earn an affiliate commission. Learn more.
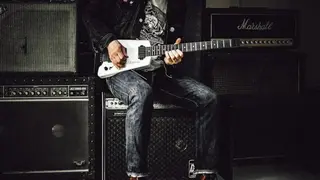
Picture this: You're finally nailing that perfect guitar solo, completely in the zone, when angry knocks from your neighbor's wall shatter the moment. Or maybe you're trying to capture that pristine vocal take, only to have it ruined by the rumble of passing traffic. If you're a musician, audiophile, or simply someone who values a quiet space, you know these frustrations all too well.
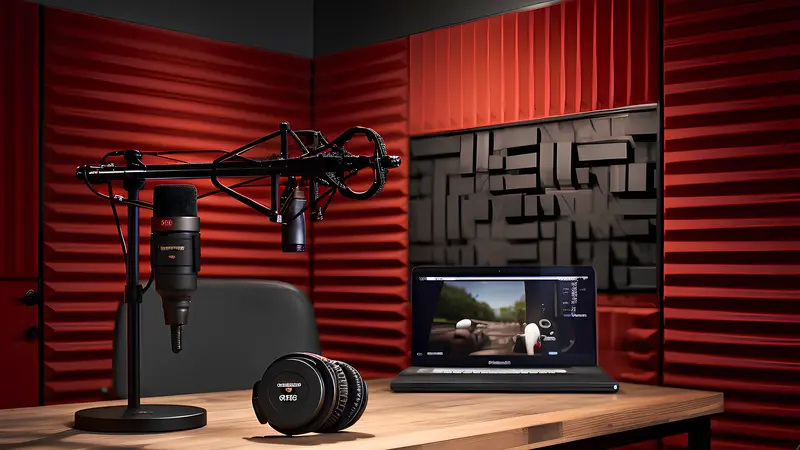
Whether you're setting up a home recording studio, creating the perfect listening room, or just trying to practice without disturbing others, soundproofing can be the difference between musical freedom and constant compromise. But here's the good news: with the right knowledge and techniques, you can significantly improve your room's sound isolation without breaking the bank or getting into a war with your neighbors.
In this comprehensive guide, we'll walk you through everything you need to know about soundproofing your space. You'll learn the fundamental principles behind effective soundproofing, discover practical solutions for every budget, and understand the difference between soundproofing and acoustic treatment (yes, they're not the same thing!). From simple DIY fixes that cost under $100 to professional-grade solutions, we'll cover methods that work for both permanent studios and rental spaces.
By the time you finish reading, you'll have a clear roadmap for creating a space where you can focus on what matters most – making and enjoying music, without worrying about external noise or disturbing others. Let's dive in and turn your noisy room into your own sonic sanctuary.
Understanding Soundproofing vs. Acoustic Treatment
If you've ever shopped for studio equipment or researched room treatment, you've likely encountered these two terms: soundproofing and acoustic treatment. They're often used interchangeably, but this common misconception can lead to costly mistakes – like spending hundreds on acoustic foam panels only to discover your neighbors can still hear every note of your midnight practice session. Before diving into specific solutions, let's clear up this crucial distinction that can make or break your studio setup.
What is Soundproofing?
Soundproofing is all about isolation – it's the art of preventing sound from entering or leaving a room. Think of it like building a fortress for your sound. When you soundproof a room, you're creating barriers that block sound waves from traveling through walls, floors, ceilings, and any other potential escape routes. This is what you need when you want to:
- Keep your drum practice from disturbing your family
- Prevent traffic noise from ruining your vocal recordings
- Block out the sound of your neighbor's late-night TV marathons
What is Acoustic Treatment?
Acoustic treatment, on the other hand, is about controlling how sound behaves within your room. It's like interior design for sound waves. When you treat a room acoustically, you're managing reflections, echoes, and reverberations to create the ideal listening or recording environment. This is what helps:
- Prevent your room from sounding like an empty bathroom
- Achieve clearer, more accurate sound monitoring
- Eliminate flutter echoes and standing waves that muddy your mix
See our editorial guide to the best acoustic panels for more.
Why You Might Need Both
Imagine you're recording vocals in your home studio. You've covered your walls with acoustic foam to tame reflections (acoustic treatment), but your microphone is still picking up the sound of cars driving by (a soundproofing issue). Or perhaps you've built thick walls to keep sound from escaping (soundproofing), but your recordings still sound boomy and unclear because your room is too reflective (an acoustic treatment issue).
For most home studios and listening rooms, the ideal approach combines both elements: soundproofing to control sound transmission between spaces, and acoustic treatment to optimize the sound within your room. The key is understanding which problem you're trying to solve before investing in solutions.
In the following sections, we'll explore specific techniques for both soundproofing and acoustic treatment, but our primary focus will be on soundproofing – keeping your sound where you want it, whether that's in or out of your room. First, let's look at the fundamental principles that make effective soundproofing possible.
Key Principles of Soundproofing
Before diving into specific solutions, it's crucial to understand the four fundamental principles that make soundproofing effective. Think of these as the pillars of sound isolation – each one plays a vital role in creating a truly soundproof space. Master these concepts, and you'll make smarter decisions about which solutions will work best for your situation.
Mass: The First Line of Defense
Adding mass to your walls, doors, or other surfaces is like building a thicker fortress wall. Sound waves lose energy as they try to push through dense materials, making it harder for them to pass through. This is why professional studios often have thick, heavy walls. But don't worry – you don't need to rebuild your entire room. Strategic use of dense materials like mass-loaded vinyl, multiple layers of drywall, or even heavy curtains can significantly increase your room's sound-blocking ability.
Decoupling: Breaking the Chain of Vibration
Sound doesn't just travel through the air – it loves to hitch a ride on solid surfaces. Decoupling means physically separating surfaces to break this chain of vibration. Imagine jumping on a trampoline that's floating in mid-air instead of being connected to the ground – the vibrations would have nowhere to go. In soundproofing terms, this might mean building a "room within a room," using resilient channels to mount drywall, or installing floating floors that don't directly touch the surrounding walls.
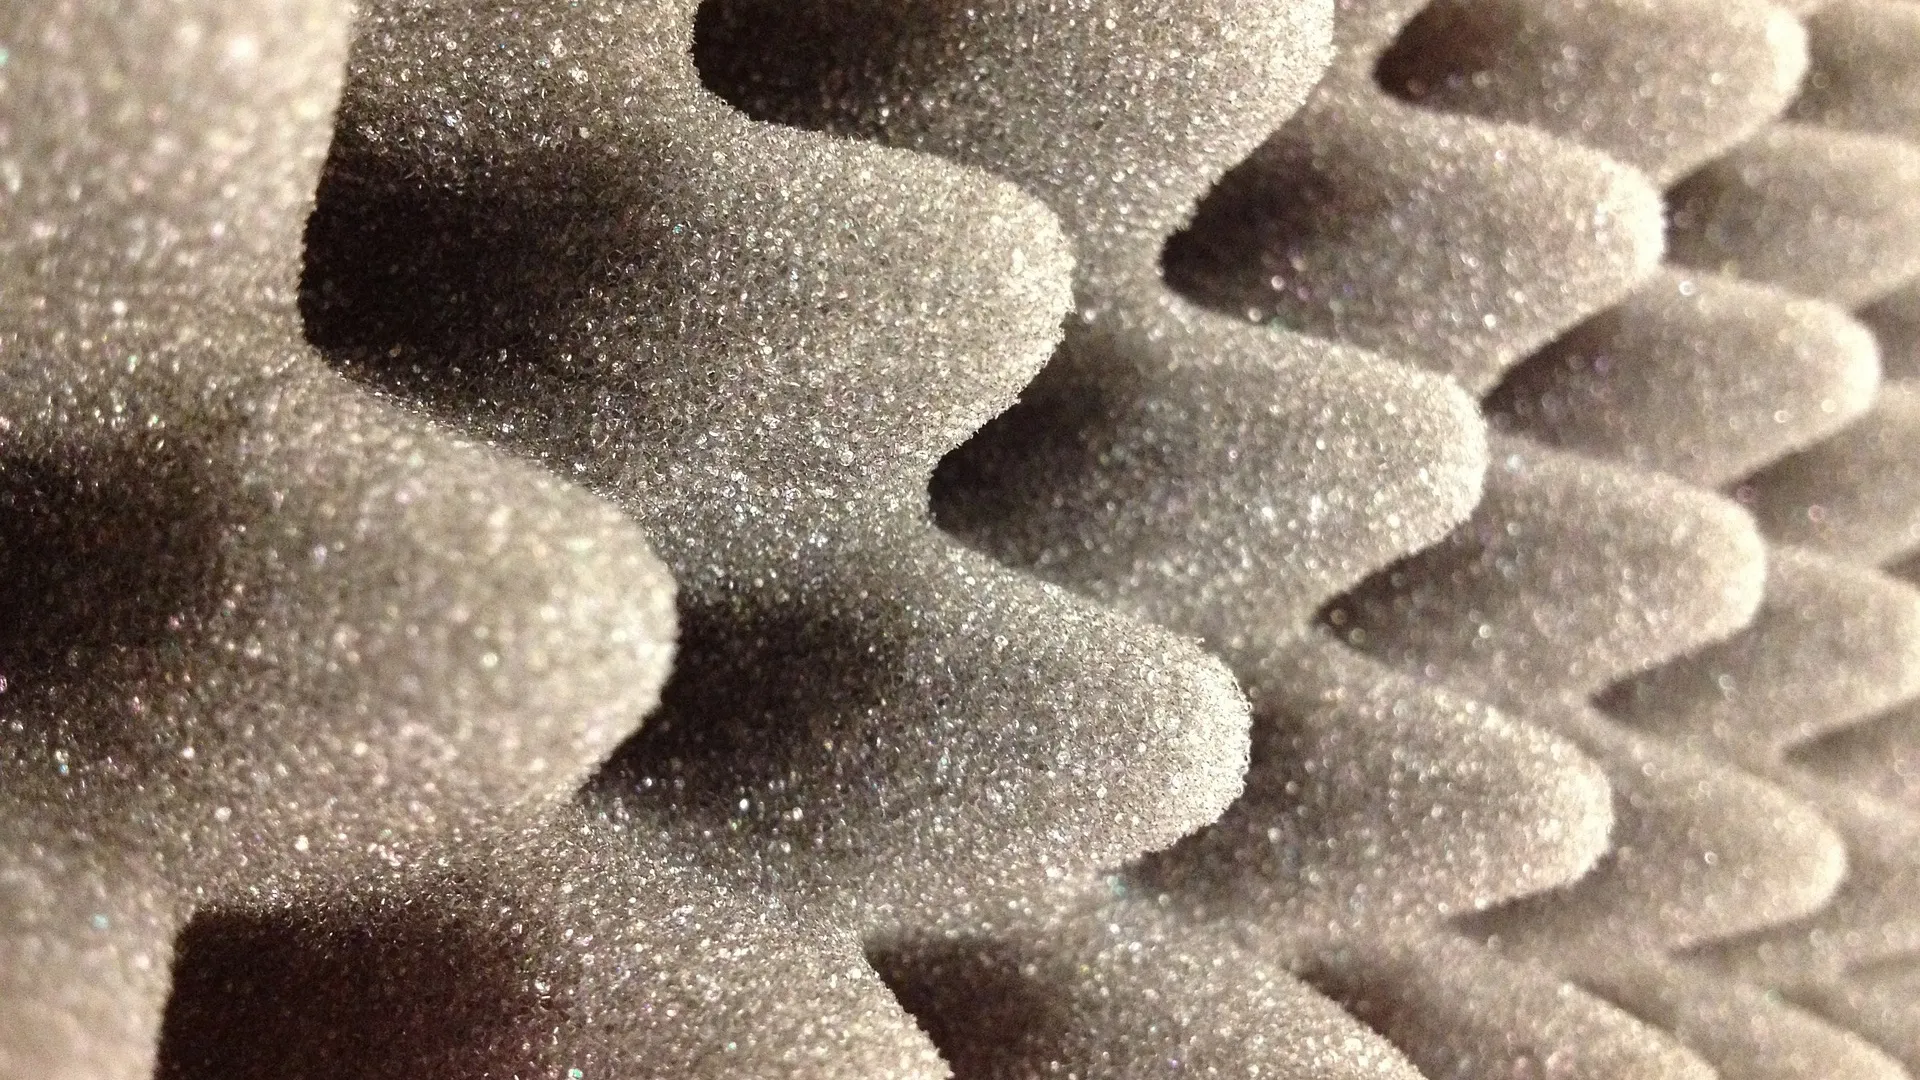
Absorption: Catching Sound Waves
While absorption alone won't soundproof a room, it plays a crucial supporting role when combined with mass and decoupling. Think of sound waves like bouncing balls – absorption materials act like nets that catch these balls and convert their energy into tiny amounts of heat. Materials like fiberglass insulation inside walls or mineral wool in cavities help reduce sound transmission while also preventing resonance within wall spaces.
Damping: The Final Touch
Damping reduces sound transmission by converting vibration energy into heat through friction. It's like the difference between striking a bell versus striking a bell that's been coated with a rubber-like material. Special damping compounds, like Green Glue, can be sandwiched between layers of drywall or other materials to significantly improve their sound-blocking performance.
Understanding these principles will help you evaluate any soundproofing solution, from basic DIY fixes to professional installations. In the next section, we'll look at practical ways to apply these principles, starting with budget-friendly options that can make a noticeable difference without major construction.
DIY Soundproofing Solutions
When it comes to soundproofing your space, you don't always need to start with a complete room rebuild. Let's explore practical solutions for every budget level, from quick weekend fixes to more comprehensive upgrades. Each of these solutions applies one or more of the fundamental principles we just discussed.
Budget-Friendly Solutions (Under $200)
The good news is you don't need to break the bank to start improving your room's sound isolation. Some of the most effective soundproofing solutions are also the most affordable. Let's start with the most crucial yet often overlooked aspect: sealing air gaps.
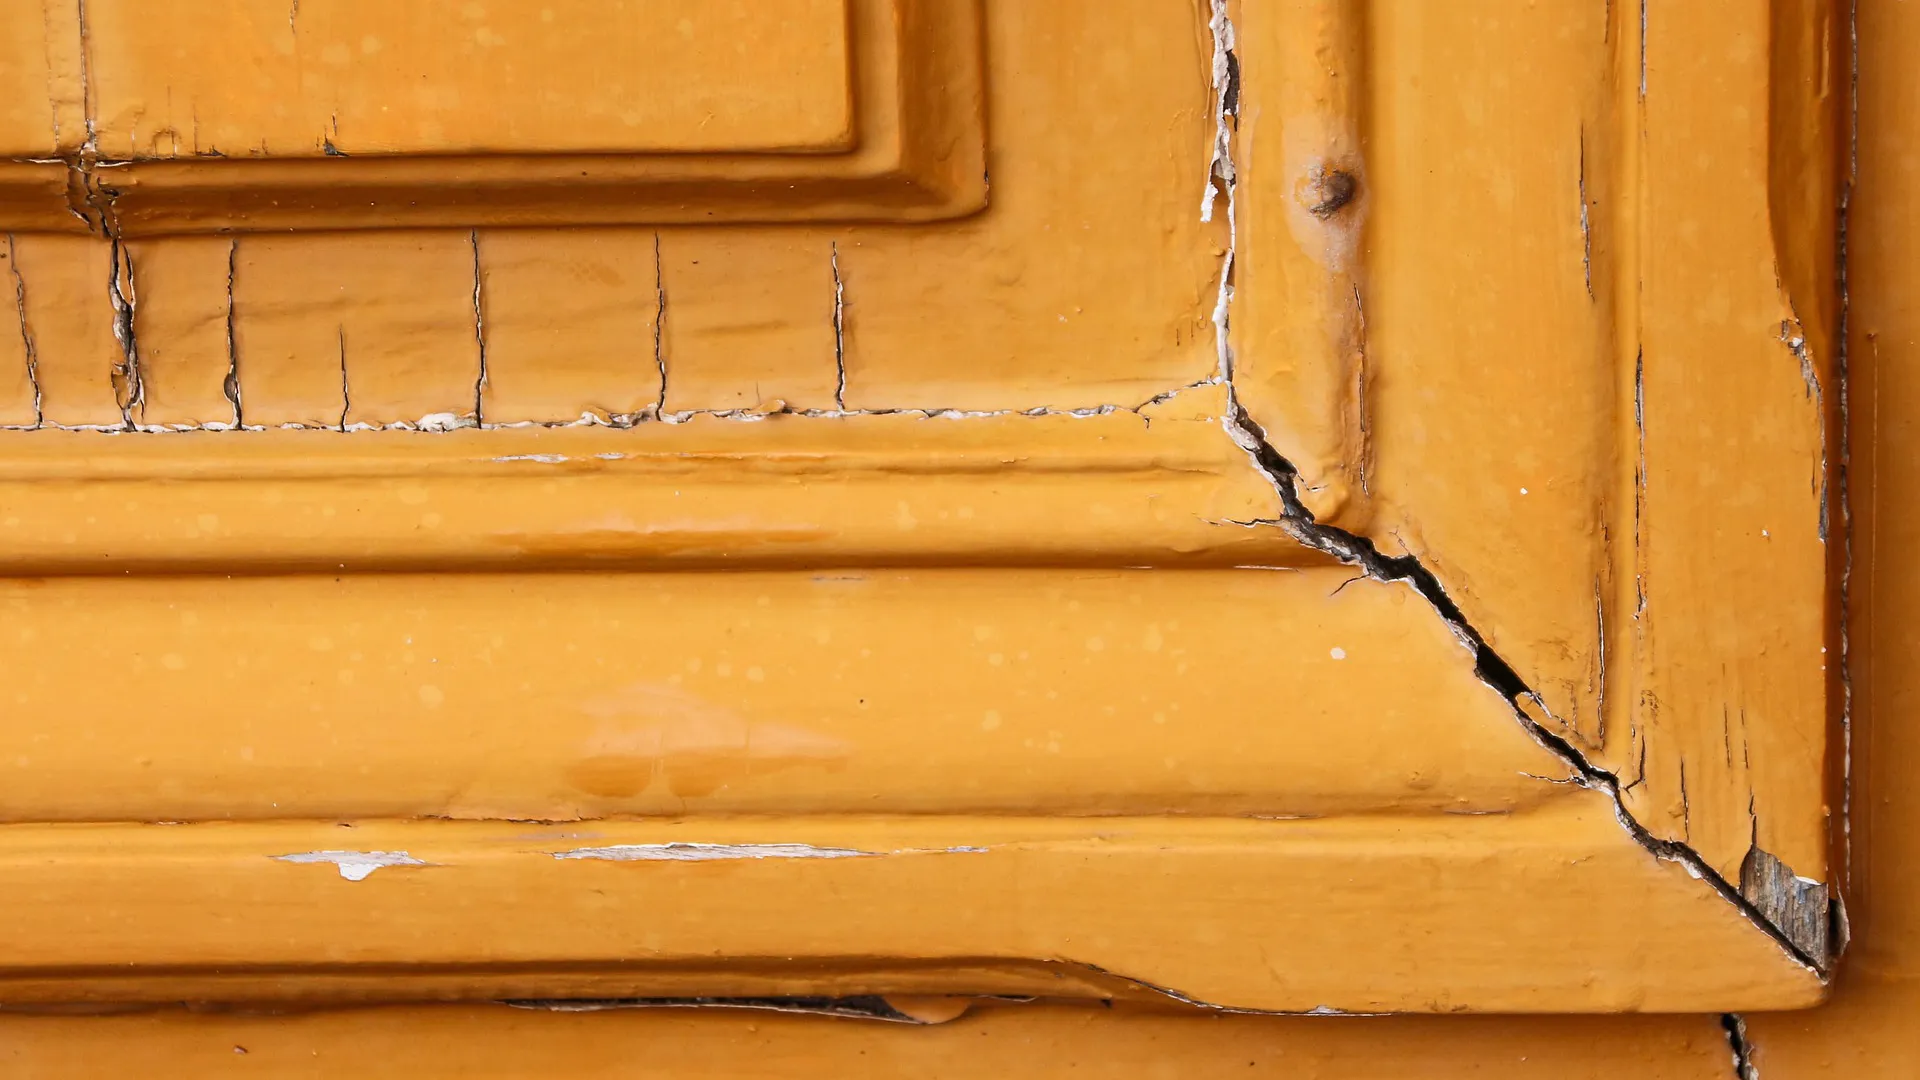
Finding and Sealing Air Gaps
Sound, much like water, will find any available path to travel through. That tiny gap under your door? It might as well be a highway for sound. Those small cracks around your electrical outlets? They're letting more sound through than you'd think. The first step in any soundproofing project should be finding and sealing these acoustic leaks.
Start by turning off the lights in your room during daylight hours. Look for any spots where light sneaks in - these are your problem areas. Common culprits include the gaps around door frames, window frames, electrical outlets, and HVAC vents. You might be surprised by how many you find.
For sealing these gaps, you'll want to use acoustic caulk rather than regular caulk. Why? Regular caulk can become brittle over time and crack, while acoustic caulk remains flexible. This flexibility is crucial because buildings naturally shift and settle. A tube of quality acoustic caulk costs around $8-12, and one tube is usually enough for an average-sized room.
Before applying the caulk, clean all surfaces thoroughly. Any dust or debris will prevent proper adhesion. Apply the caulk in a continuous bead, and use your finger (wearing a latex glove) to smooth it into the gap. Don't worry about making it look pretty - focus on creating a complete seal. For larger gaps, particularly those wider than ¼ inch, stuff them first with foam backer rod before applying the caulk. This prevents the caulk from sinking too deeply into the gap and ensures a proper seal.
Tackling the Door
Your door is likely the biggest weak point in your room's sound isolation. A standard hollow-core door does almost nothing to block sound, and that gap at the bottom might as well be an open window. Here's how to address this without spending a fortune.
First, install a door sweep. You have two options here: a screw-on sweep or an automatic door sweep. The screw-on variety costs about $10-15 and is simpler to install, but it might drag on carpet or create resistance when opening and closing the door. An automatic door sweep ($20-25) retracts when you open the door and drops down when closed - it's worth the extra money if you use the door frequently.
Next, add weatherstripping around the entire door frame. Don't cheap out here - those adhesive foam strips from the dollar store will compress and lose effectiveness within weeks. Instead, invest in silicone or EPDM weatherstripping ($10-15). Clean the door frame thoroughly with isopropyl alcohol before application, and apply the weatherstripping in continuous strips rather than piecing it together. The goal is to create a consistent seal when the door is closed.
For additional sound blocking, consider hanging a heavy moving blanket directly on the door. Moving blankets are dense and relatively inexpensive ($25-30), and they can make a noticeable difference in sound transmission. Use strong adhesive hooks at the top of the door to hang the blanket, and let it extend slightly below the bottom of the door for maximum coverage.
Strategic Furniture Placement
While most people focus on adding new materials to their room, your existing furniture can be a powerful soundproofing ally when used strategically. Bookcases, in particular, are extremely effective due to their mass and density - especially when filled with books. A fully loaded bookcase can add significant sound-blocking mass to a wall without any additional expense.
The key is proper placement. Start by identifying your room's most problematic walls - typically those shared with neighbors or noisy areas. Position your bookcases against these walls, but here's the crucial detail many people miss: don't push them directly against the wall. Leave a 1-2 inch gap. This gap, while seemingly counterintuitive, helps break up sound transmission by creating an air space between the wall and the bookcase. Fill this gap with acoustic foam or even rolled-up towels for better performance.
When it comes to books, pack them tightly. Sound waves love empty spaces, so a partially-filled bookcase is far less effective than a fully-loaded one. Don't have enough books? Magazines, board games, or any dense materials will work. The goal is mass and density.
Floor Treatment on a Budget
Hard floors, while beautiful, can create significant sound reflection problems. The good news is that strategic use of rugs can make a substantial difference without requiring permanent changes to your flooring.
Start with the largest area rug you can afford or already own. The key detail that many overlook is what goes under the rug. A quality rug pad doesn't just make your rug more comfortable - it adds another layer of sound absorption. Look for dense felt rug pads rather than the typical waffle-pattern rubber ones. While a good felt pad might cost $30-40, it essentially doubles your rug's acoustic effectiveness.
For even better results, consider layering rugs. This doesn't mean your room needs to look like a carpet warehouse - strategic layering can actually create visual interest while providing better sound absorption. Start with a larger, simpler rug as your base, then add a smaller, perhaps more decorative rug on top. The varying densities and materials of different rugs work together to absorb different frequencies of sound.
If you're dealing with impact noise (footsteps from above or transmission to rooms below), consider creating designated paths in your room using interlocking foam mats. These gym-style mats can be found for around $20-30 for a pack of six 2x2 foot squares. While they're not the most attractive solution, they can be remarkably effective at reducing impact noise transmission, and they're easily removable when needed.
DIY Window Treatment
Windows are often the weakest link in a room's soundproofing, but professional soundproof windows can cost thousands. Here's how to significantly improve your window's sound isolation on a budget.
Start with heavy curtains - but installation details matter tremendously. Mount your curtain rod at least 4-6 inches wider than your window frame on each side, and position it as close to the ceiling as possible. This allows your curtains to completely cover the window and create a better seal against the wall. When selecting curtains, look for those labeled as "thermal" or "blackout." These typically have multiple layers and higher mass, making them more effective at blocking sound.
For even better performance, create a double-curtain setup. Install a double rod system ($25-30) and hang sheer curtains on the inner rod with heavy curtains on the outer rod. This creates multiple layers of sound absorption with different densities, which is more effective than a single, thicker layer.
The most overlooked detail with curtains is the bottom hem - they should break slightly on the floor, creating a seal that prevents sound from sneaking around the bottom. If your curtains don't reach the floor, consider adding a fabric panel at the bottom rather than replacing them entirely.
| Solution Area | Materials Needed | Cost Range | Key Tips |
|---|---|---|---|
| Air Gap Sealing |
• Acoustic caulk • Foam backer rod • Latex gloves |
$8-12 | Check for light leaks during daylight with lights off. Clean surfaces before applying. Use backer rod for gaps larger than ¼ inch. |
| Door Treatment |
• Door sweep • Weatherstripping • Moving blanket • Adhesive hooks |
$45-60 | Use automatic door sweep for frequent use. Apply weatherstripping in continuous strips. Extend moving blanket below door bottom. |
| Furniture Placement |
• Existing bookcases • Books/dense materials • Acoustic foam/towels |
$0-20 | Leave 1-2 inch gap between bookcase and wall. Pack books tightly. Fill gaps with acoustic foam or rolled towels. |
| Floor Treatment |
• Area rugs • Dense felt rug pad • Interlocking foam mats |
$50-70 | Use dense felt pads under rugs. Consider layering rugs for better sound absorption. Use foam mats for high-traffic areas. |
| Window Treatment |
• Thermal/blackout curtains • Double curtain rod • Sheer curtains |
$75-100 | Mount rods 4-6 inches wider than window. Use double-layer system. Ensure curtains break slightly on floor. |
| Total Budget Range: | $178-262 (Complete implementation) | ||
Intermediate Solutions ($200-1,000)

Once you've implemented the basic solutions and are ready to take your soundproofing to the next level, it's time to consider more substantial improvements. These intermediate solutions require a bigger investment and more effort, but they'll provide significantly better results.
Mass-Loaded Vinyl: Your New Best Friend
Mass-loaded vinyl (MLV) is one of the most versatile and effective soundproofing materials available to DIYers. Imagine a heavy, flexible sheet that's about 1/8 inch thick and weighs around a pound per square foot. This density is what makes it so effective at blocking sound.
Installing MLV requires careful planning and usually an extra set of hands. The material comes in rolls, typically 4 feet wide, and can be quite unwieldy. The most effective installation method is to cover your entire wall, ensuring there are no gaps between sheets. Overlap seams by at least 2 inches and seal them with acoustic tape. Many beginners make the mistake of using staples or nails to hang MLV – don't. These create holes that compromise its effectiveness and can cause the material to tear under its own weight.
Instead, use a combination of acoustic adhesive and furring strips. Start at the top of your wall, using the furring strips to create a secure hanging point. Work your way down, keeping the MLV taut but not stretched. The material should hang straight but not be under tension. Pay special attention to edges and corners – these are common weak points where sound can leak through.
The Double Drywall Sandwich
Adding a second layer of drywall might seem simple, but there's an art to doing it effectively. The secret weapon here is a damping compound called Green Glue. This specialized compound transforms sound energy into heat through a process called viscoelastic damping. It's messy, expensive (about $30-40 per tube), and worth every penny.
Here's the crucial detail many DIYers miss: Green Glue isn't an adhesive. You'll still need to mechanically fasten your second layer of drywall. The compound needs to be sandwiched between two rigid surfaces to work effectively. Apply it in a random pattern of squiggles rather than straight lines or dots. You want about 80% coverage, using two tubes per 4x8 sheet of drywall.
Timing is critical when working with Green Glue. You have about 15 minutes to get your drywall hung after applying the compound. It takes about 30 days to fully cure, but you'll notice improvements within hours. One common mistake is trying to conserve the compound by using less – this significantly reduces its effectiveness. Follow the manufacturer's recommendations for coverage.
Building Effective Window Plugs
While hanging heavy curtains can help, a properly constructed window plug can provide dramatically better sound isolation. A window plug is essentially a removable panel that fits snugly into your window frame, creating an airtight seal.
The key to an effective window plug lies in its layered construction. Start with a frame made of 1x4 lumber cut to fit inside your window frame with about 1/8 inch clearance on all sides. Build it like a shallow box, with one side covered in 1/2 inch plywood. This creates a cavity that you'll fill with insulation. Many people use fiberglass, but mineral wool (Rockwool) is a better choice – it's denser and doesn't pose the same health risks.
The magic happens in the sealing system. Attach high-density foam weatherstripping around the edges of your plug – this creates the airtight seal that makes the plug effective. Add handles for easy removal, and consider magnetic catches to hold it securely in place. The outer face (room side) should be covered with an aesthetically pleasing fabric to help it blend with your decor.
Resilient Channel Installation
Resilient channels are one of the most effective ways to decouple your walls and reduce sound transmission, but they're also one of the most commonly misinstalled components in DIY soundproofing projects.
These metal channels look simple – they're basically long, flexible metal strips with attachment points. But their installation requires precise attention to detail. The channels should be installed horizontally on your walls, spaced 24 inches apart, with the open side facing down. This is crucial – installing them upside down (a surprisingly common mistake) completely negates their effectiveness.
The most critical detail is ensuring that your drywall screws only penetrate the channel, not the underlying stud. If even a single screw touches a stud, you've created a sound bridge that compromises the entire system. Use shorter screws than you typically would for drywall installation, and mark your channel locations carefully.
Solid-Core Door Upgrade
Replacing your hollow-core door with a solid-core version is a significant upgrade, but the installation details matter more than most people realize. First, the door itself: look for doors labeled "STC-rated" (Sound Transmission Class). These are specifically designed for sound blocking and typically cost $300-500.
The installation process is where many DIYers stumble. You need to address three critical areas:
- The door frame must be properly sealed. Fill any gaps between the frame and the wall with acoustic caulk and foam backer rod.
- The hinges must be solid and properly aligned. Loose or misaligned hinges create gaps that leak sound.
- The threshold and weatherstripping system needs to create a complete seal when the door is closed.
Consider adding an automatic door bottom ($40-60) that drops down when the door closes. This creates a better seal than a traditional sweep while being more convenient to use.
Advanced Insulation Techniques
While you've got your walls open for resilient channel installation, take the opportunity to upgrade your insulation. Standard fiberglass batts are okay, but you can do better. Consider using mineral wool insulation (like Rockwool Safe'n'Sound) between studs. It's denser than fiberglass and provides better sound absorption across a wider range of frequencies.
The installation technique matters enormously. Cut the batts slightly oversized – they should fit snugly but not be compressed. Compression reduces their effectiveness. Pay special attention to areas around electrical boxes and other penetrations. These areas often get compressed or skipped entirely, creating weak points in your soundproofing.
| Solution | Materials Needed | Cost Range | Critical Installation Tips |
|---|---|---|---|
| Mass-Loaded Vinyl (MLV) |
• MLV rolls (4ft wide) • Acoustic adhesive • Furring strips • Acoustic tape |
$300-500 | Avoid using staples/nails. Overlap seams by 2 inches. Keep material taut but not stretched. Use furring strips for secure mounting. Requires two-person installation. |
| Double Drywall with Green Glue |
• Additional drywall • Green Glue (2 tubes per 4x8 sheet) • Drywall screws • Installation tools |
$450-650 | Apply Green Glue in random patterns. Achieve 80% coverage. Complete installation within 15 minutes of application. Mechanically fasten drywall. Allow 30 days for full curing. |
| Window Plugs |
• 1x4 lumber • ½" plywood • Mineral wool insulation • Weatherstripping • Fabric covering |
$100-150 | Leave ⅛" clearance around edges. Use high-density foam weatherstripping. Add handles and magnetic catches. Choose mineral wool over fiberglass for better density. |
| Resilient Channels |
• Resilient channels • Short drywall screws • Marking tools • Installation hardware |
$200-300 | Install channels 24" apart. Open side must face down. Ensure screws don't touch studs. Mark channel locations precisely. Single stud contact compromises entire system. |
| Solid-Core Door |
• STC-rated solid door • Automatic door bottom • Acoustic caulk • Foam backer rod • Heavy-duty hinges |
$340-560 | Properly seal door frame. Ensure precise hinge alignment. Install automatic door bottom for better seal. Fill all frame gaps with acoustic caulk and backer rod. |
| Advanced Insulation |
• Mineral wool insulation • Cutting tools • Safety equipment • Installation hardware |
$200-300 | Cut batts slightly oversized. Avoid compression. Pay special attention to electrical boxes. Ensure complete coverage with no gaps. |
| Total Investment Range: | $1,590-2,460 (Complete implementation of all solutions) | ||
Advanced Methods ($1000+)
When you're ready to achieve professional-level soundproofing, you'll need to invest in more comprehensive solutions. These methods often require significant construction work, but they provide the highest level of sound isolation possible in a residential setting.
The Room Within a Room Concept
The holy grail of soundproofing is the room-within-a-room design, also known as double-wall construction. This approach completely decouples your studio space from the surrounding structure, creating an acoustic environment that's truly isolated from the outside world.
The basic principle is straightforward but the execution is complex. You're essentially building a new room inside your existing room, with no direct physical connections between the two structures. The inner room floats on its own foundation, typically a concrete pad isolated by rubber underlayment or specialized isolation pads. The walls are built on this floating foundation, with careful attention to ensure they never touch the outer walls.
The air gap between the walls is crucial – ideally, you want at least 4-6 inches of space. This gap creates a sound barrier far more effective than any single wall, no matter how thick. Both wall assemblies should be constructed using staggered studs or double stud construction, ensuring that no direct sound paths exist through the structure.
One critical detail that often gets overlooked is the electrical system. You can't simply run conduit through both walls – this creates a direct sound path that compromises your isolation. Instead, you need separate electrical systems for the inner and outer walls, with flexible connections at junction points.
Float Your Floor
A floating floor is essential for serious soundproofing, especially in upper-story rooms or when dealing with impact noise. The most effective approach uses multiple layers:
- Start with U-boat floor isolators placed on the subfloor. These rubber and metal isolators create an air gap beneath your new floor structure.
- Install engineered I-joists or sleepers across these isolators.
- Fill the cavities between joists with mineral wool insulation.
- Add a layer of 3/4" plywood, followed by mass-loaded vinyl.
- Top with another layer of plywood.
- Finally, install your finished flooring.
The key detail most DIYers miss is maintaining the isolation at the edges. Your floating floor must never touch the walls – use perimeter isolation strips to maintain a small gap all the way around. This gap gets covered by baseboards that attach only to the walls, never to the floor.
Advanced Ceiling Treatment
The ceiling often presents unique challenges in soundproofing, particularly when dealing with overhead noise or trying to prevent sound from escaping upward. The most effective solution involves creating a decoupled ceiling system that can actually "float" below your existing ceiling.
Start with a hat channel and clip system. These specialized clips, like the Whisper Clips or GenieClips, provide superior isolation compared to standard resilient channels. They're designed to hold hat channels (also called furring channels) away from the joists, creating mechanical separation. The key is proper spacing – clips should be placed no more than 48 inches apart along the joists, with the first and last clips no more than 6 inches from the walls.
The hat channels run perpendicular to your joists, typically spaced 24 inches on center. Here's where many people make a crucial mistake: they try to save money by using fewer clips or spacing channels further apart. This compromises the entire system's performance and can lead to sagging over time.
HVAC Considerations
Ventilation systems are often the acoustic weak link in an otherwise well-soundproofed room. Air needs to move, but sound will follow the same paths. Here's how to address this:
Build soundproof boxes around any HVAC vents that enter your room. These boxes should be constructed like small maze-like chambers lined with acoustic absorption material. The goal is to force the sound to make several turns while maintaining adequate airflow. Each turn reduces sound transmission.
For maximum effectiveness, install flexible ductwork between your main HVAC system and your room. This flexible ducting should form at least one complete loop before entering the room, creating a natural sound trap. Line the final few feet of ductwork with sound-absorbing duct liner.
Professional-Grade Door Systems
At this level, standard solid-core doors won't cut it. Consider investing in purpose-built studio doors with magnetic seals and cam-lift hinges. These doors, while expensive ($2000-3500), provide dramatically better performance than conventional doors.
The real secret is in the frame system. Professional studio doors use specialized frames with multiple sets of seals – typically a combination of compression seals and magnetic seals. The cam-lift hinges slightly raise the door when opening and lower it when closing, creating perfect compression against the seals every time.
Electrical and Network Infrastructure
Sound isolation requires careful attention to electrical penetrations. Every outlet box, switch, or cable penetration creates a potential weak point. The solution is to use putty pads – malleable sheets of sound-dampening material that wrap around electrical boxes. But don't stop there:
Create dedicated electrical chases within your room-within-a-room construction. These should be carefully planned to avoid creating direct sound paths between the inner and outer walls. All cable penetrations should be sealed with acoustic putty, not just standard caulk.
Professional Window Treatment
At this level, basic window plugs won't suffice. The most effective solution is a laminated glass system with an air gap. This involves installing a completely new window frame inside your room, separated from the existing window by an air space of at least 4 inches. Here's the detailed approach:
Build a new window frame that's completely isolated from your room's structure. The frame should be mounted on neoprene isolators to prevent vibration transfer. Use laminated glass that's at least 3/8 inch thick – this specialized glass consists of multiple layers with a sound-dampening interlayer. Many people make the mistake of using standard double-pane glass, which isn't nearly as effective for sound isolation.
For maximum effectiveness, angle one of the glass panels slightly (about 3-5 degrees). This prevents standing waves from forming between the parallel glass surfaces. The air cavity between the windows should be lined with acoustic absorption material around the perimeter, leaving the center clear for visibility.
Monitoring and Testing Systems
Professional soundproofing requires precise measurement and verification. Invest in proper testing equipment:
- A calibrated sound level meter (not just a smartphone app)
- A sound generator capable of producing pink noise at various frequencies
- An acoustic analysis system for measuring frequency response and reverberation time
The testing process should be methodical:
- Create baseline measurements before starting any work
- Test each stage of construction
- Perform final testing across multiple frequencies
- Document all results for future reference
One often overlooked aspect is testing under different environmental conditions. Sound transmission can vary significantly with temperature and humidity changes. Test during different times of day and in different weather conditions to ensure consistent performance.
Vibration Isolation Systems
For ultimate sound isolation, address structural vibration:
Install a complete floating floor system on neoprene isolators or specialized spring mounts. These systems need to be carefully calculated based on the room's mass and expected load. A common mistake is underspecifying the isolation system, leading to bottoming out under heavy loads.
Use bridge bearing neoprene pads under all wall plates where they meet the floating floor. These pads prevent flanking transmission – sound that travels through the building's structure around your soundproofing.
Maintenance and Long-term Performance
Professional-grade soundproofing requires regular maintenance and monitoring to maintain its effectiveness over time. Here's a comprehensive approach to ensuring your investment continues to perform:
Regular Inspection Schedule
Establish a quarterly inspection routine focusing on critical areas:
Door Seals and Gaskets: These components face the most wear and tear through daily use. Check magnetic seals for proper contact, inspect gaskets for compression set (permanent deformation), and verify that cam-lift hinges are operating smoothly. Even minor degradation in door seals can significantly impact overall room performance.
Floating Floor Perimeter: Inspect the isolation gap around your floating floor. Over time, building settlement can cause subtle shifts that create contact points between isolated components. Use a thin feeler gauge to verify that isolation gaps remain consistent. Pay special attention to areas near doorways and corners where movement is most likely.
Window Systems: Check the seals around your laminated glass installation. Temperature cycles and UV exposure can degrade sealants over time. Look for any condensation between panes – this indicates a failed seal that needs immediate attention. Test the isolation mounts for proper compression and replace any that show signs of degradation.
Performance Verification
Conduct biannual performance testing:
- Use your calibrated sound level meter to measure noise reduction across different frequencies
- Compare results against your baseline documentation
- Create a "sound map" of your room to identify any weak points that may have developed
- Test under various environmental conditions to ensure consistent performance
Climate Control Considerations
Maintain strict environmental control:
- Monitor humidity levels – excessive moisture can affect the performance of acoustic materials
- Keep temperature stable – significant temperature swings can stress isolation systems
- Regularly inspect HVAC components, particularly the sound maze boxes and flexible ducting
- Clean or replace acoustic duct liners according to manufacturer specifications
Future-Proofing and Documentation
Maintain detailed records of:
- Original construction details and specifications
- All test results and measurements
- Maintenance procedures and schedules
- Any modifications or repairs
- Supplier information for specialized components
Create a comprehensive maintenance manual that includes:
- Detailed drawings of all isolation systems
- Specifications for all materials used
- Step-by-step procedures for common maintenance tasks
- Troubleshooting guides for potential issues
- Emergency repair procedures
Think of your soundproofing system as a living entity that requires constant attention. Small issues can compound over time, so early detection and correction are crucial for maintaining optimal performance.
| Advanced Solution | Components & Materials | Cost Range | Critical Requirements |
|---|---|---|---|
| Room Within a Room |
• Concrete floating foundation • Rubber underlayment • Double wall structure • Separate electrical system • Isolation materials |
$5,000-8,000 | Maintain 4-6 inch air gap between walls. No physical contact between structures. Use staggered studs. Separate electrical systems required. Complete structural isolation essential. |
| Floating Floor System |
• U-boat floor isolators • Engineered I-joists • Mineral wool insulation • Multiple plywood layers • Mass-loaded vinyl • Perimeter isolation strips |
$3,000-5,000 | Never allow floor contact with walls. Install layers in correct sequence. Maintain isolation at edges. Attach baseboards to walls only. Calculate load requirements accurately. |
| Advanced Ceiling |
• Hat channels • Whisper/GenieClips • Multiple drywall layers • Isolation hardware • Green Glue compound |
$2,500-4,000 | Clips maximum 48" apart. First/last clips within 6" of walls. Channels 24" on center. Avoid shortcuts in clip quantity. Ensure proper mechanical separation. |
| HVAC System |
• Sound maze boxes • Flexible ductwork • Acoustic duct liner • Absorption materials • Custom baffles |
$2,000-3,500 | Create multiple turns in ductwork. Line final sections with absorption. Build effective sound maze boxes. Maintain proper airflow while maximizing sound reduction. |
| Professional Door |
• Studio-grade door • Magnetic seals • Cam-lift hinges • Specialized frame • Multiple seal systems |
$2,000-3,500 | Install both compression and magnetic seals. Ensure perfect frame alignment. Proper cam-lift hinge operation essential. Complete seal system required. |
| Professional Windows |
• Laminated glass (3/8"+) • Neoprene isolators • Custom frames • Acoustic absorption • Specialized sealants |
$3,000-5,000 | Maintain 4" minimum air gap. Angle one panel 3-5°. Use proper isolation mounts. Line cavity perimeter with absorption. Ensure complete seal integrity. |
| Testing Equipment |
• Calibrated sound meter • Pink noise generator • Analysis software • Measurement tools • Documentation system |
$1,500-3,000 | Regular testing schedule required. Document all measurements. Test under various conditions. Create comprehensive baseline data. Monitor changes over time. |
| Total Professional System Range: | $19,000-32,000 (Complete professional implementation) | ||
Professional Soundproofing Tips: When to Call in the Experts
There comes a point in many soundproofing projects where professional expertise isn't just helpful – it's essential. Understanding when to make this call can save you time, money, and prevent costly mistakes that could compromise your room's acoustic integrity.
When to Hire a Professional
While DIY solutions can be effective for basic to intermediate soundproofing needs, certain situations demand professional intervention:
Complex Structural Modifications When your project requires removing or modifying load-bearing walls, professionals aren't just helpful – they're legally required. A structural engineer needs to assess your plans before any significant construction begins. This is particularly crucial for room-within-a-room constructions where floor loading and building codes come into play.
Many enthusiastic DIYers have learned the hard way that structural integrity isn't something you can guess at. Even seemingly simple modifications like adding mass to walls or ceiling can potentially overload your building's design limits.
HVAC System Modifications Ventilation is often the acoustic weak point in many soundproofing projects. Professional HVAC engineers understand how to maintain proper air flow while minimizing sound transmission. They can:
- Calculate proper duct sizing to maintain air flow with sound maze installations
- Design custom silencer systems that won't strain your HVAC system
- Ensure your modifications won't violate building codes or compromise air quality
Building Code Compliance Professional contractors understand local building codes and can ensure your project meets all requirements. This becomes especially important when:
- Installing new electrical systems in isolated walls
- Modifying fire barriers or rated assemblies
- Adding significant weight to existing structures
- Changing room egress or ventilation systems
Finding the Right Professional
Not all contractors understand soundproofing, and not all acoustic consultants understand construction. Here's how to find the right team:
Acoustic Consultants Start with an acoustic consultant before hiring contractors. A good consultant will:
- Perform detailed acoustic measurements of your space
- Identify specific problem frequencies and transmission paths
- Create a comprehensive treatment plan
- Provide specifications for materials and construction methods
- Recommend qualified contractors
- Verify the work meets acoustic performance targets
Look for consultants with credentials from organizations like INCE (Institute of Noise Control Engineering) or AES (Audio Engineering Society). Ask about their experience with projects similar to yours.
Contractors When selecting contractors:
- Ask for examples of previous soundproofing projects
- Check if they're familiar with specific soundproofing materials and techniques
- Verify they understand the importance of details like complete air sealing
- Ensure they're willing to work with your acoustic consultant
- Get detailed quotes that specify materials and methods
The Professional Construction Process
A professional soundproofing project typically follows these stages:
Initial Assessment
- Acoustic measurements and analysis
- Structural evaluation
- Code compliance review
- Budget discussion
Design Phase
- Detailed construction drawings
- Material specifications
- Timeline development
- Permit applications
Construction
- Regular inspections by acoustic consultant
- Testing of each layer before proceeding
- Careful documentation of all work
- Regular progress meetings
Final Testing
- Comprehensive acoustic measurements
- Performance verification
- Documentation of results
- Client training on maintenance
Soundproofing Specific Spaces
Each type of space presents unique soundproofing challenges and requires specific approaches. Let's break down the most common scenarios and their particular requirements.
Home Recording Studios
Home studios require the most comprehensive soundproofing approach because they need to both keep sound in and maintain a pristine internal acoustic environment. The main challenges include:
Low-Frequency Control Bass frequencies are typically the biggest challenge in home studios. Unlike high frequencies, bass waves can travel through solid structures with relative ease. Studio owners often focus on wall mass while neglecting proper bass management. The solution requires a multi-layered approach:
- Implement bass traps in corners, but not just the vertical corners. The intersection of walls and ceiling are crucial points.
- Consider a floating floor design, especially if you're recording drums or bass-heavy instruments.
- Use soffit bass traps where the walls meet the ceiling – these aren't just aesthetic choices but crucial acoustic tools.
Ventilation Requirements Studios generate heat from equipment and people, making proper ventilation essential. However, standard HVAC can create unwanted noise and compromise isolation. Here's what works:
- Install variable-speed fans that can run slower (and quieter) during recording
- Create longer, lined ductwork paths with multiple bends
- Use separate HVAC zones if possible, allowing you to shut down noisy components during critical recording
- Install fan silencers and ensure all ductwork is properly isolated from the structure
Apartments and Rental Spaces
Renters face unique challenges because they can't make permanent structural changes. However, effective solutions are still possible:
Non-Destructive Solutions Focus on reversible modifications that won't violate your lease:
- Create free-standing acoustic panels that can be placed against walls without mounting
- Use heavy curtains on ceiling tracks to create temporary sound barriers
- Install portable bass traps that sit in corners without attachment
- Implement floating flooring systems that can be removed when you move
Neighbor Relations Sometimes the best soundproofing is good communication:
- Establish clear practice schedules with neighbors
- Share your phone number for immediate feedback
- Consider offering neighbors earplugs or white noise machines
- Document your soundproofing efforts to show good faith
Listening Rooms for Audiophiles
Listening rooms have different requirements from recording studios. While studios need to be relatively "dead" acoustically, listening rooms often benefit from some controlled reflections.
Room Symmetry Proper listening room design starts with symmetry:
- Ensure speakers are placed equidistant from side walls
- Create a symmetrical arrangement of acoustic treatments
- Position listening position(s) carefully based on room dimensions
- Account for doors and windows in your acoustic planning
First Reflection Points Critical in listening rooms:
- Map out reflection points using the mirror method
- Install appropriate absorption or diffusion at these points
- Consider both seated and standing listening positions
- Balance absorption with diffusion for natural sound
Common Soundproofing Mistakes to Avoid
After working with countless musicians, audiophiles, and studio owners, certain mistakes appear time and time again. Understanding these common pitfalls can save you significant time, money, and frustration.
Misunderstanding Mass vs. Absorption
Perhaps the most expensive mistake is confusing soundproofing with acoustic treatment. We've seen countless people spend hundreds on acoustic foam panels, expecting them to block sound transmission, only to find their neighbors can still hear everything. Here's the reality:
Acoustic foam and similar absorptive materials do almost nothing to block sound transmission. They only treat the acoustic environment within the room. Think of it this way: if you can speak through it, sound will travel through it. True soundproofing requires mass, and lots of it.
The Air Gap Myth
Many people believe that simply creating an air gap between two walls is enough for sound isolation. While air gaps are important, they're only effective when properly implemented. A simple empty cavity between walls can actually create a resonance chamber that amplifies certain frequencies.
The correct approach is to combine air gaps with proper damping materials. This means filling the cavity with appropriate insulation and ensuring the two walls are truly decoupled from each other. Without proper decoupling, you're essentially creating a drum that can transmit sound even more effectively than a single wall.
The Single Weak Point Problem
Sound follows the path of least resistance. Many people spend thousands on heavily soundproofed walls only to leave a significant weak point untreated. Common culprits include:
- Standard electrical outlets installed back-to-back on opposite sides of a wall
- Unsealed HVAC vents and returns
- Door undercuts and gaps around door frames
- Improperly sealed windows
- Structural connections that bridge isolated walls
One small gap can reduce your overall soundproofing effectiveness by 50% or more. This isn't just theory – it's basic physics. Sound, like water, will find any available path to travel through.
Insufficient Floor Isolation
Floor transmission is often overlooked, especially in multi-story buildings. People focus on walls and ceilings but forget that impact noise and structural vibration through the floor can be just as problematic. Simply laying down rubber mats or carpet isn't enough.
Proper floor isolation requires addressing both airborne and structure-borne sound. This means implementing proper floating floor construction or using specialized isolation systems designed for specific applications like drum rooms or dance studios.
The "More Is Better" Fallacy
Some people assume that if one layer of drywall is good, four must be better. Or if 2 inches of air gap works, 6 inches will work three times better. This kind of linear thinking can lead to:
- Unnecessary expense
- Structural problems from excessive weight
- Wasted space
- No significant improvement in performance
The key is understanding that soundproofing is about the right combination of techniques working together, not just piling on more of the same solution.
How to Measure Success
Measuring the effectiveness of your soundproofing efforts involves more than just subjective listening. Proper measurement helps you identify problems, validate solutions, and ensure you're getting the results you're paying for.
Understanding Sound Measurement Basics
Before diving into testing methods, it's crucial to understand what we're measuring. Sound isolation effectiveness is typically measured in STC (Sound Transmission Class) or NIC (Noise Isolation Class) ratings. However, these standardized measurements require specialized equipment and testing conditions. For practical purposes, we'll focus on methods that provide meaningful real-world results.
Basic Testing Methods
The Decibel Test Start with a baseline measurement using a calibrated sound level meter (not just a smartphone app). While phone apps can be useful for rough estimates, they're not accurate enough for serious testing. Here's the proper testing procedure:
- Create a consistent test sound in the source room (pink noise is ideal)
- Measure the sound level at multiple points in both the source and receiving rooms
- Calculate the difference between the two readings
- Repeat measurements at different frequencies if your meter allows
Remember: A 10 dB reduction means sound energy has been reduced by 90%. A 20 dB reduction means a 99% reduction. This helps put your measurements in perspective.
Advanced Testing Procedures
Frequency-Specific Testing Different frequencies behave differently, and overall decibel readings don't tell the whole story. Professional testing includes:
- Low-frequency sweep tests (especially important for music rooms)
- Impact noise testing for floors
- Flanking transmission tests to identify indirect sound paths
- Reverberation time measurements
Real-World Validation While technical measurements are important, real-world testing is crucial:
- Record typical usage scenarios (music practice, conversation, etc.)
- Test during different times of day (building materials behave differently with temperature changes)
- Get feedback from neighbors or adjacent rooms
- Document before and after results with video and audio recordings
Long-Term Monitoring
Success isn't just about initial results – it's about maintaining effectiveness over time:
- Keep a log of regular measurements
- Note any changes in performance
- Monitor for developing problems (like seal degradation)
- Track environmental factors that might affect performance
Interpreting Results
Understanding your measurements in context is crucial:
- Perfect soundproofing doesn't exist – set realistic goals
- Focus on problem frequencies specific to your use case
- Consider the cost-benefit ratio of additional improvements
- Compare results to industry standards for your specific needs
Budget Breakdown
Understanding the real costs of soundproofing helps you plan effectively and avoid unpleasant surprises. Let's break down the costs for different levels of soundproofing, from basic improvements to professional-grade isolation.
Basic Level ($200-500)
This budget focuses on the most cost-effective improvements:
Materials Breakdown: - Acoustic caulk and weatherstripping: $50-75 - Door sweep and seals: $30-50 - Heavy curtains or moving blankets: $100-200 - Basic absorption materials: $50-100 - Miscellaneous hardware: $50
What to Expect: - 5-10 dB reduction in sound transmission - Most effective for high frequencies - Minimal impact on bass frequencies - Good for basic noise reduction in apartments - Suitable for practicing acoustic instruments
Intermediate Level ($1,000-3,000)
This level introduces serious soundproofing materials and techniques:
Materials and Components: - Mass-loaded vinyl: $300-500 - Green Glue (6-8 tubes): $250-350 - Additional drywall layer: $200-300 - Resilient channels: $200-300 - Solid core door: $300-500 - Professional weatherstripping: $100-150 - Mineral wool insulation: $200-300 - Installation materials: $200-400
Labor Costs (if hiring help): - Basic installation: $500-1,000 - Electrical modifications: $200-400 - Door installation: $150-250
Professional Level ($5,000-15,000+)
For serious studios or critical listening rooms:
Construction Materials: - Double wall construction: $2,000-3,000 - Floating floor system: $1,500-2,500 - Specialized door system: $2,000-3,500 - HVAC modifications: $1,000-2,000 - Professional acoustic treatments: $1,500-2,500 - Isolation clips and channels: $800-1,200 - Multiple layers of drywall: $600-1,000 - Green Glue (15-20 tubes): $600-800 - Specialized windows: $1,000-2,000
Professional Services: - Acoustic consultant: $500-1,500 - Construction labor: $2,000-5,000 - HVAC specialist: $500-1,000 - Electrical work: $500-1,000 - Final testing and certification: $500-1,000
Hidden Costs to Consider
Permits and Approvals: - Building permits: $100-500 - Structural engineer review (if needed): $500-1,000 - HOA approvals: Varies
Preparation Costs: - Room clearing and storage: $200-500 - Demolition and disposal: $500-1,000 - Temporary accommodations during construction: Varies
Maintenance Costs: - Regular seal replacement: $50-100/year - Professional testing: $200-500/year - HVAC maintenance: $100-200/year
| Level & Total Cost | Components | Cost Range | Expected Results |
|---|---|---|---|
| Basic Level ($200-500) |
Acoustic Caulk & Weatherstripping | $50-75 | • 5-10 dB reduction • Effective for high frequencies • Minimal bass impact • Good for apartments • Suitable for acoustic instruments |
| Door Sweep & Seals | $30-50 | ||
| Heavy Curtains/Moving Blankets | $100-200 | ||
| Basic Absorption Materials | $50-100 | ||
| Miscellaneous Hardware | $50 | ||
| Total Basic Level | $280-475 | ||
| Intermediate Level ($1,000-3,000) |
Mass-Loaded Vinyl | $300-500 | • 15-20 dB reduction • Good bass control • Suitable for electric instruments • Effective for home studios • Notable improvement in isolation |
| Green Glue (6-8 tubes) | $250-350 | ||
| Additional Drywall Layer | $200-300 | ||
| Resilient Channels | $200-300 | ||
| Solid Core Door | $300-500 | ||
| Professional Weatherstripping | $100-150 | ||
| Mineral Wool Insulation | $200-300 | ||
| Installation Materials | $200-400 | ||
| Labor Costs | $850-1,650 | ||
| Total Intermediate Level | $2,800-4,450 | ||
| Professional Level ($5,000-15,000+) |
Double Wall Construction | $2,000-3,000 | • 30-40 dB reduction • Professional studio quality • Excellent bass control • Suitable for all instruments • Recording studio grade isolation |
| Floating Floor System | $1,500-2,500 | ||
| Specialized Door System | $2,000-3,500 | ||
| HVAC Modifications | $1,000-2,000 | ||
| Professional Acoustic Treatments | $1,500-2,500 | ||
| Isolation Clips and Channels | $800-1,200 | ||
| Multiple Drywall Layers | $600-1,000 | ||
| Green Glue (15-20 tubes) | $600-800 | ||
| Specialized Windows | $1,000-2,000 | ||
| Professional Services | $4,000-9,500 | ||
| Permits and Approvals | $600-1,500 | ||
| Preparation Costs | $700-1,500 | ||
| Total Professional Level | $16,300-31,000 |
* All prices are estimates and may vary by location and market conditions
* Labor costs may vary significantly based on your location and contractor
* Additional costs may include maintenance, repairs, and periodic testing
Conclusion: Creating Your Sound-Controlled Space
Soundproofing is both an art and a science. Whether you're a musician seeking the perfect practice space, an audiophile creating your ideal listening room, or simply someone looking for a quieter environment, the journey to effective sound control is a worthwhile investment in your acoustic future.
Key Takeaways
Remember that successful soundproofing is built on understanding and implementing core principles: - No single solution works for every situation - Start with sealing air gaps before investing in expensive solutions - Address all potential sound transmission paths - Consider your specific needs and budget when choosing solutions - Regular maintenance is crucial for long-term effectiveness
Starting Your Project
Begin with a clear assessment of your needs and resources. Even if you're planning a professional-level installation, start with basic improvements while you plan. Small improvements can make a noticeable difference while you work toward your ultimate goals.
The Investment Perspective
Think of soundproofing as a long-term investment. While the initial costs might seem high, consider: - The value added to your property - The creative freedom of a well-isolated space - Improved relationships with neighbors - Better quality recordings or listening experiences - Reduced stress from unwanted noise
Final Thoughts
Whatever level of soundproofing you choose to implement, remember that attention to detail makes all the difference. Take your time, plan carefully, and don't hesitate to seek professional advice when needed. A properly soundproofed room is a joy to work or relax in, and the benefits will be appreciated for years to come.
The most successful soundproofing projects are those that balance technical excellence with practical constraints. Whether you're implementing basic solutions or building a professional studio, each step you take toward better sound isolation is a step toward a more controlled and enjoyable acoustic environment.
Remember: The perfect soundproof room doesn't exist, but with the right approach, you can create a space that meets your needs and exceeds your expectations. Start your journey with clear goals, realistic expectations, and a solid understanding of the principles we've covered, and you'll be well on your way to creating your ideal acoustic environment.
Top Ranked Acoustical Treatments on Equipboard


About the authors
Mason is a freelance music gear writer that contributes to Equipboard, Reverb, TuneCore, Music Aficionado, and more. He plays the guitar and mandolin and resides in Wyoming. Read more
New in Acoustical Treatments


$159.00 - $209.00
in Acoustical Treatments Rank


$359.00 - $789.00
in Acoustical Treatments Rank

$286.00 - $549.00
in Acoustical Treatments Rank


$362.00 - $789.00
in Acoustical Treatments Rank


.webp)


.webp)