

Table of Contents
Equipboard
Equipboard is the world's largest community of artists and their gear. Read our review process.
We are reader-supported. When you buy through links on our site, we may earn an affiliate commission. Learn more.
Changing guitar strings is essential for every guitarist to keep their instrument sounding fresh, whether you’re a beginner or an experienced player. Old strings can sound dull, lack sustain, and make your guitar harder to keep in tune. In this guide, we’ll walk you through stringing electric, acoustic, and classical guitars step by step, with tips to ensure the best possible sound and playability.
Why Regularly Changing Your Guitar Strings Matters
Regularly changing strings ensures your guitar maintains its tone, playability, and tuning stability. Over time, dirt, oil, and sweat build up on the strings, dulling their sound and causing tuning issues. For players who practice or perform frequently, changing strings every 2-4 weeks is ideal, while more casual players may be able to go a month or two before noticing a drop in quality.
What You’ll Need
- New set of strings (see our guides for the best electric, acoustic, or classical strings)
- String winder (optional, but speeds up the process)
- Wire cutters
- Tuner (if you need a tuner, check out our guide to the top guitar tuners)
- Soft cloth (for cleaning)
- Bridge pin puller (for acoustic guitars)
Preparing to Restring Your Guitar
Before you begin, clear a stable, well-lit workspace. A table or workbench with a towel underneath will protect your guitar from scratches. Having all your tools within reach helps keep the process smooth.
Loosen the Old Strings: Start by loosening each string until it has no tension. Using a string winder can speed this up. Once loose, cut the strings in the middle.
Remove the Old Strings: For electric and classical guitars, unwind each string from the tuning peg and remove it from the bridge. For acoustic guitars, you may need to remove the bridge pins.
Step-by-Step Guide to Stringing Different Types of Guitars
1. How to String an Electric Guitar
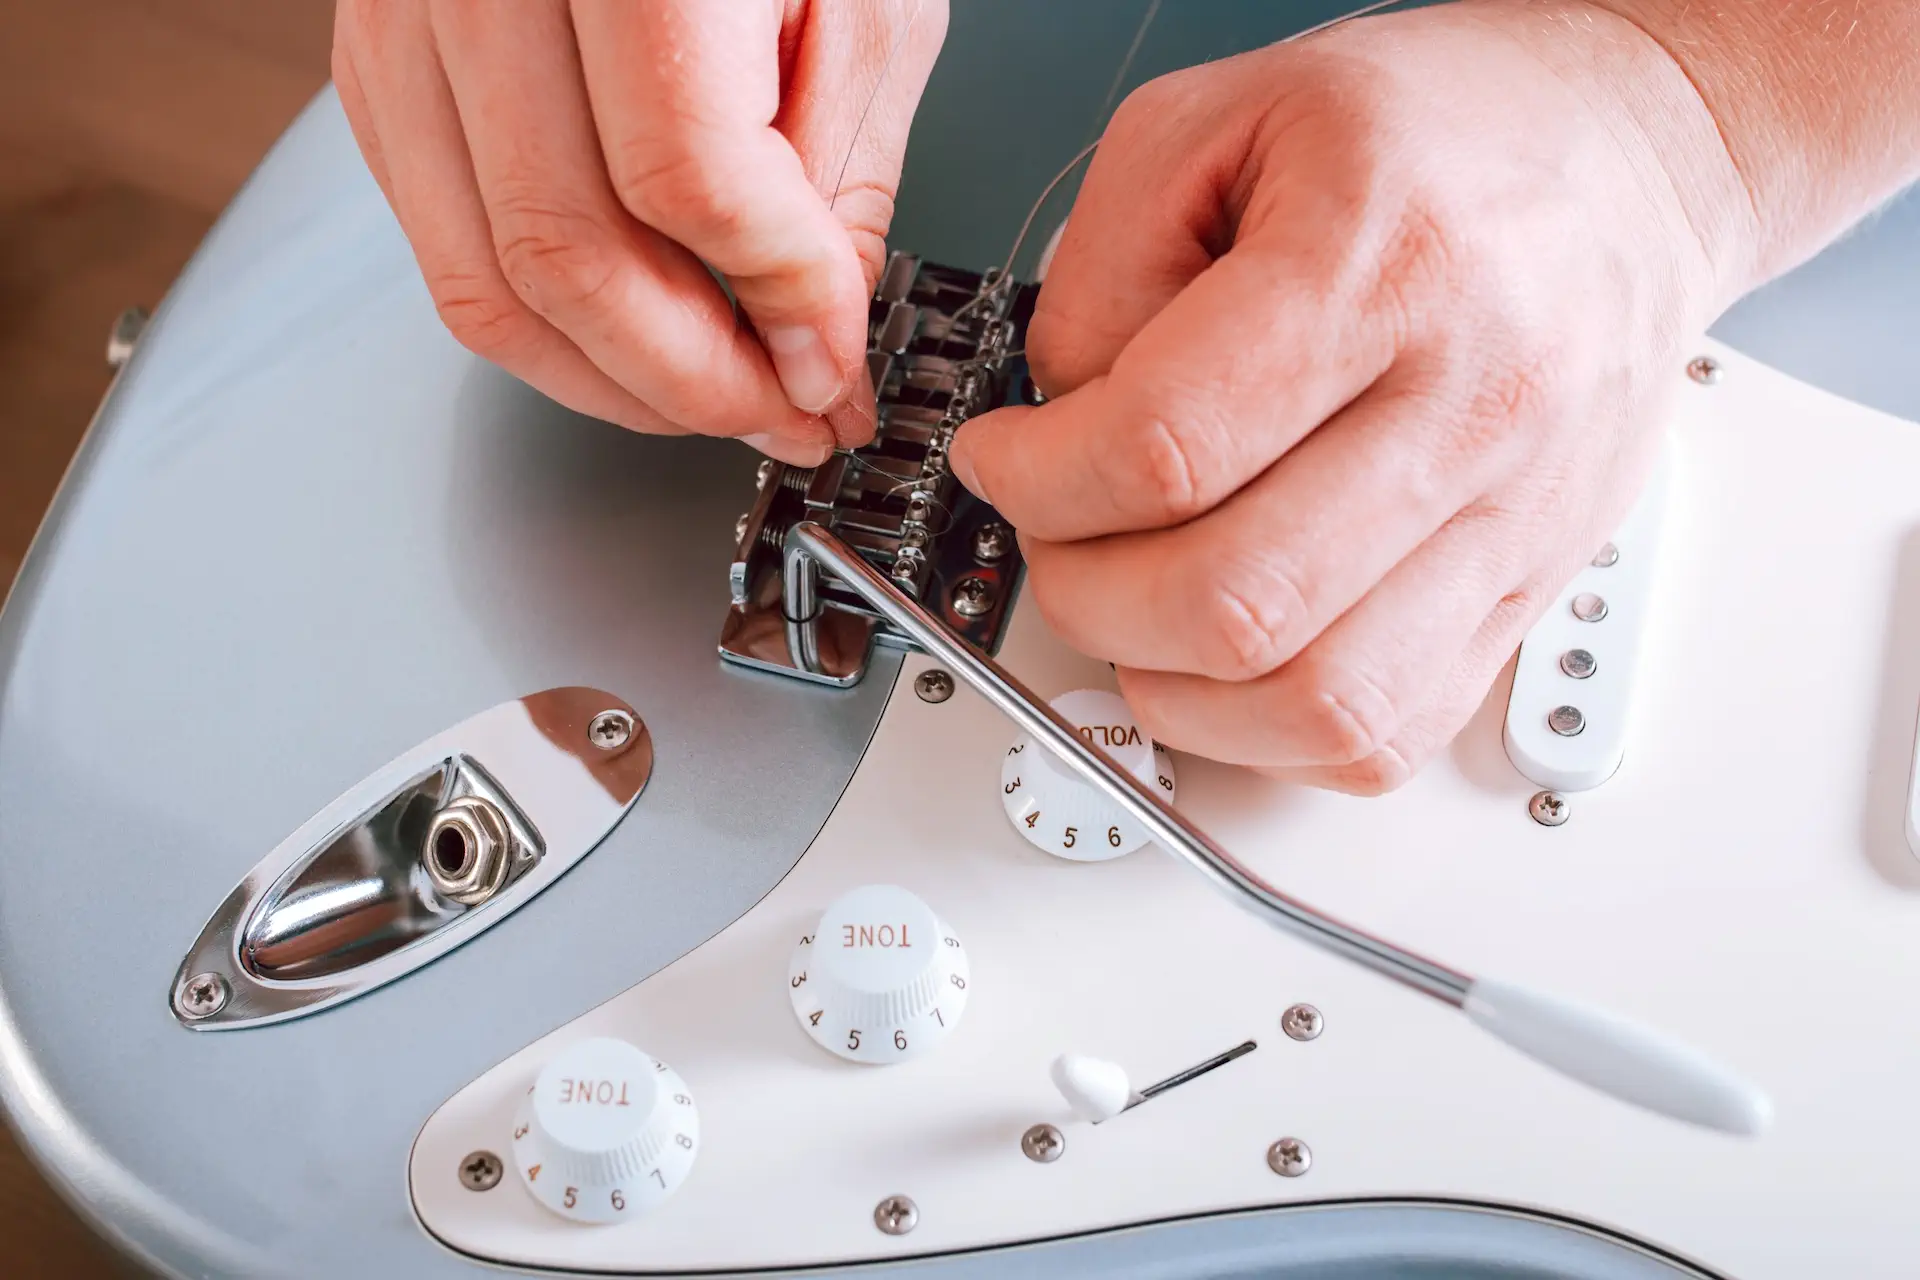
Electric guitars are generally the easiest to restring because they lack bridge pins. However, the process can vary slightly depending on your bridge type (e.g., hardtail, tremolo, or Floyd Rose). Here’s a general method for most electric guitars:
Step 1: Remove the Old Strings
As mentioned, cut the strings once loosened, then pull them out from the bridge.
Step 2: Clean the Fretboard
Take this opportunity to clean the fretboard with a soft cloth or fretboard cleaner if needed.
Step 3: Insert the New Strings
Feed each new string through the bridge and up toward the tuning pegs. Some guitars may have holes in the back of the guitar body where you thread the strings through (common with Stratocaster-style bridges). Check our complete guide to the best guitar strings for electric guitars for to find our which strings are the best for your needs.
Step 4: Wind the Strings
To restring your guitar, start by inserting the string end through the tuning peg hole and pulling it tight. For optimal tuning stability, leave a few inches of slack for each string before you begin winding. As you turn the tuning peg—clockwise or counterclockwise, depending on which side of the headstock you're working on - keep the string taut. While winding, ensure the string wraps neatly downward toward the headstock, as this adds extra stability and helps maintain consistent tuning.
Step 5: Stretch and Tune the Strings
Once all strings are installed, tune each string roughly to pitch. Afterwards, gently pull each string around the 12th fret to stretch it. This step is crucial for keeping your guitar in tune after restringing.
2. How to String an Acoustic Guitar
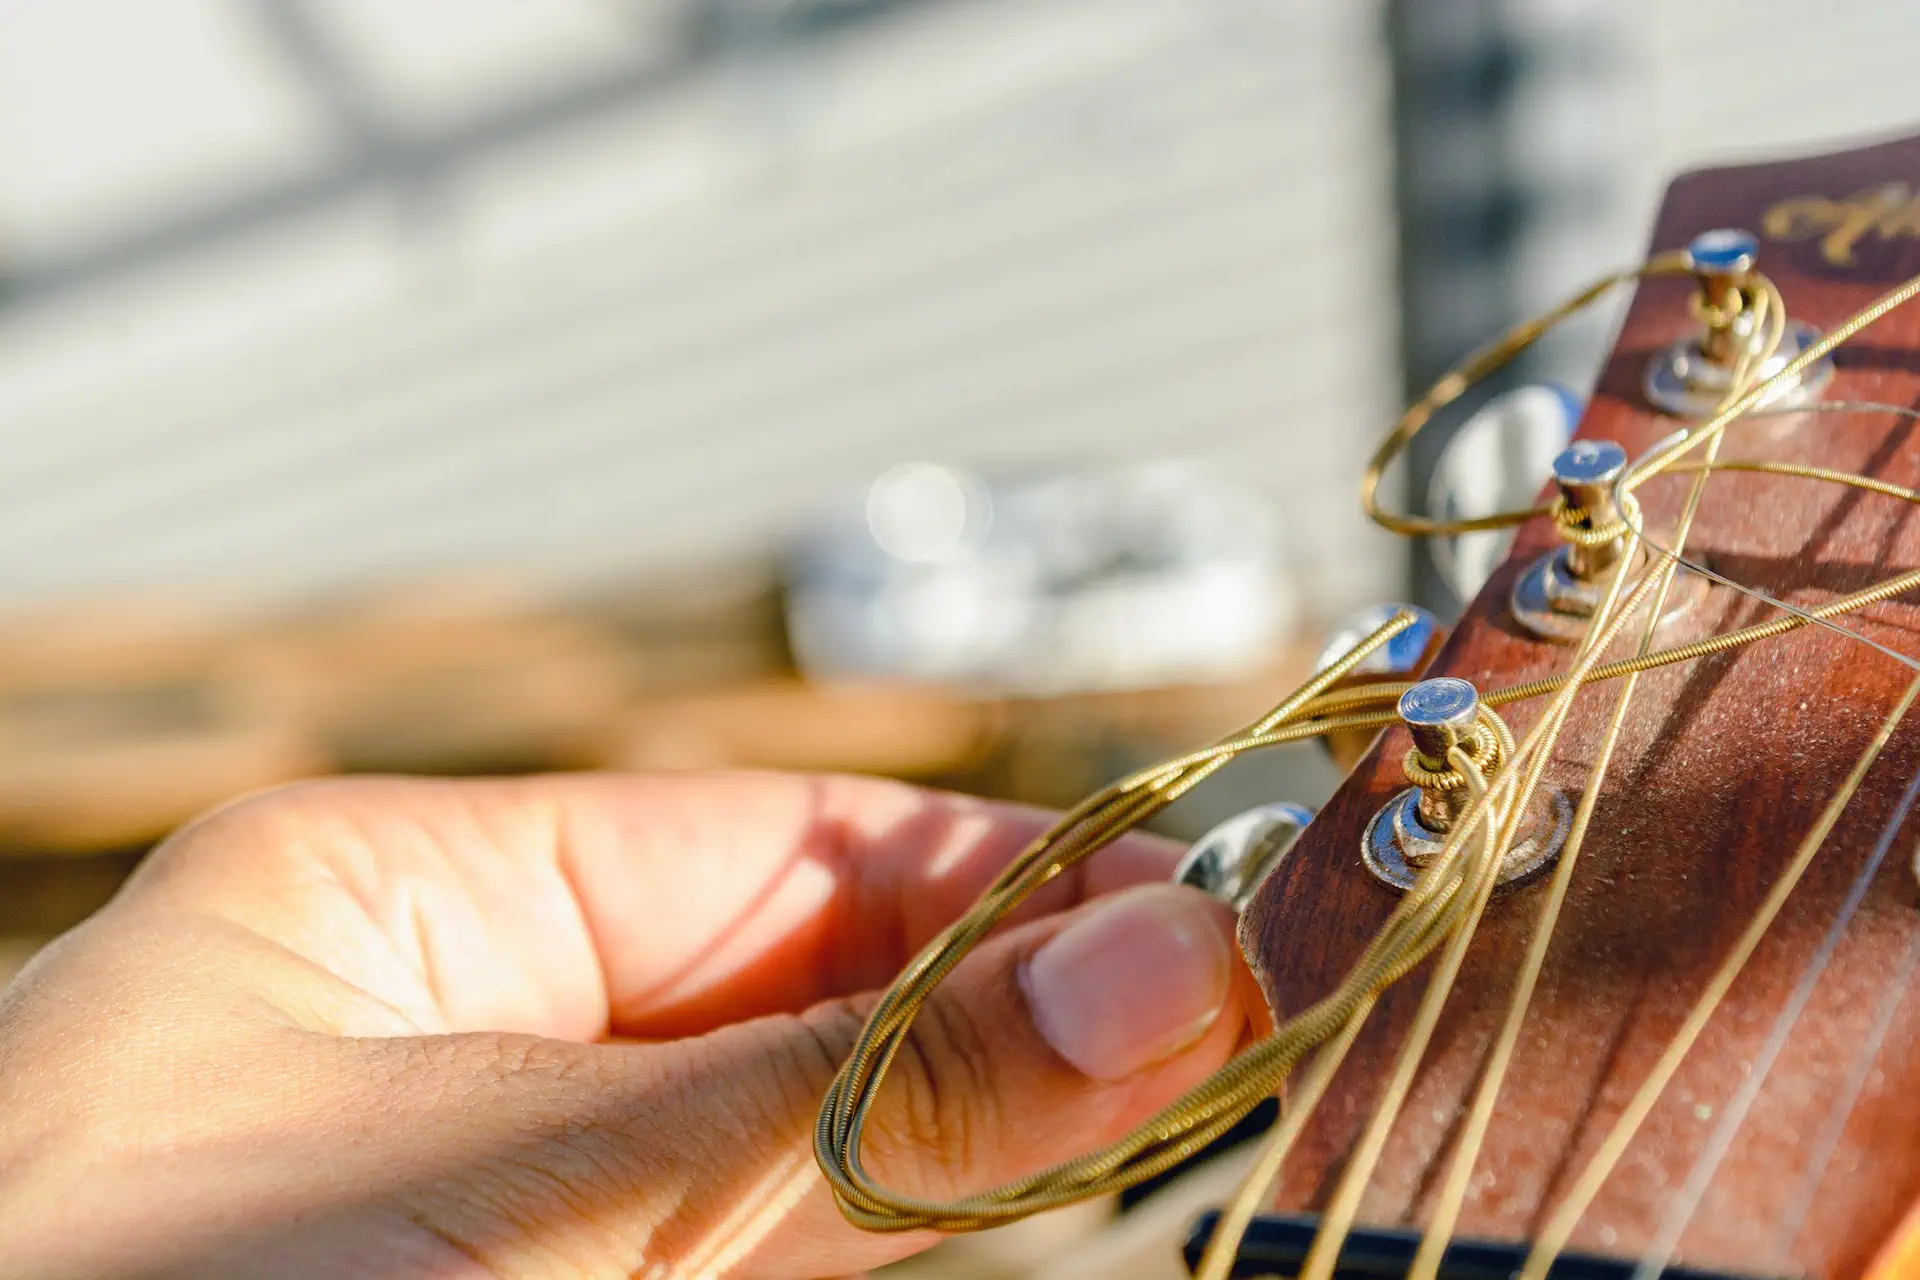
Acoustic guitars use bridge pins, which require a slightly different process than electric guitars. Here’s how to restring an acoustic guitar:
Step 1: Remove the Old Strings and Bridge Pins
Using a bridge pin puller or your hands, carefully remove each bridge pin. Be gentle to avoid damaging the pins or bridge.
Step 2: Clean the Fretboard and Bridge
Use a cloth to wipe down the fretboard and bridge area, which are often hard to reach with strings in place.
Step 3: Insert the New Strings
Begin by taking the ball end of each string and placing it into the corresponding hole in the bridge. Next, reinsert the bridge pin over the string, ensuring that the groove in the pin aligns with the string. Press down firmly on the bridge pin while gently pulling the string to confirm that it is secure and properly seated. For information on choosing the right strings for your needs, check out our guide to the best acoustic guitar strings.
Step 4: Wind the Strings
Pull the string up to the tuning peg and leave a bit of slack to allow for proper winding. Begin turning the tuning peg, making sure the string wraps neatly downward along the tuning post. For improved tuning stability, you can use a technique where the string wraps over itself on the first wind before continuing to wind neatly below.
Step 5: Tune and Stretch the Strings
Tune each string up to pitch and gently pull on each string to help it settle. This helps avoid frequent retuning as the strings adjust.
3. How to String a Classical Guitar

Classical guitars use nylon strings and have a different bridge design, requiring a unique restringing method. Here’s how:
Step 1: Remove the Old Strings
Classical strings are usually tied to the bridge, so untie each knot and remove the string.
Step 2: Clean the Fretboard
Nylon strings tend to last longer than steel strings, so take this chance to clean the fretboard and other hard-to-reach areas.
Step 3: Tie the New Strings to the Bridge
Insert the end of the string through the bridge hole, leaving a few inches of excess. Loop the string under itself and pull it tight to form a secure knot. For added stability, especially on the lower (thicker) strings, you can loop the string under itself twice before tightening.
Step 4: Attach to the Tuning Pegs
Insert the string through the tuning peg hole, leaving a bit of slack. Begin winding the string, ensuring that it wraps neatly downward along the peg. Keep in mind that classical guitars typically don’t require as much slack as steel-string guitars. Make sure each wrap is tidy and secure to prevent slippage.
Step 5: Tune and Stretch
Since nylon strings stretch more than steel, they require more frequent tuning initially. Tune each string to pitch, then gently stretch it to help it settle faster.
Additional Tips for a Smooth Restringing Process
Avoid over-tightening the strings as you bring them up to pitch; it’s best to do this slowly to prevent breakage. New strings often take a few hours or even days to fully settle, so check and retune them regularly during this period. Once the strings are in tune, use wire cutters to trim any excess string near the tuning pegs. This keeps the headstock tidy and prevents accidental pokes.
Common Mistakes to Avoid
Skipping the stretching step can result in constant retuning, so be sure to stretch new strings after installing them. Always use fresh strings rather than old or rusty ones, as this ensures optimal tone and playability. Additionally, take care to wind the strings properly—messy or inconsistent wraps can lead to tuning instability.
How Often to Change Guitar Strings
How frequently you should change your guitar strings depends on several factors, including your playing style, the type of strings you use, and environmental conditions. Here are some general guidelines:
- Frequent Players or Performers: If you play daily or perform live, changing strings every 2-4 weeks can keep your sound fresh and responsive. Frequent playing causes strings to lose brightness due to dirt and oils from your fingers.
- Casual Players: For guitarists who play a few times a week, changing strings every 1-3 months is typically enough to maintain a good sound.
- Infrequent Players: If you play only occasionally, strings may last for 6 months or more. However, keep in mind that even with limited use, strings can dull and corrode over time.
- Climate and Humidity Considerations: If you live in a humid environment or tend to sweat a lot, you may need to change strings more often as moisture speeds up corrosion. Coated strings can help resist this and may last longer in such conditions.
Setting Up Your Guitar After Restringing
After restringing, a quick setup check will ensure your guitar sounds and feels its best. Here’s what to focus on:
- Stretch the Strings: New strings can slip and stretch, so after installing, gently pull each string away from the fretboard and retune. Repeat this a few times to improve tuning stability.
- Tune and Check Intonation:
- Tune Up: Tune each string to pitch, using a tuner for accuracy.
- Check Intonation: After tuning, check the intonation by playing the 12th fret harmonic and the fretted note on the 12th fret. If these don’t match in pitch, adjust the saddle position (electric guitar) or visit a professional for acoustic and classical guitars to ensure the guitar stays in tune across the fretboard.
- Adjust Action and Neck Relief (Optional):
- Action: If you’ve changed string gauges, you may need to adjust the action (string height) to avoid buzzing or improve playability. Electric guitars and some acoustic guitars allow saddle adjustments, while classical guitars may need more specialized adjustments.
- Neck Relief: Heavier strings can cause slight neck bowing. Check neck relief by pressing down on the first and last frets of a string and observing the gap between the string and the 7th or 8th fret. Adjust the truss rod if needed, or take it to a technician.
- Clean and Lubricate the Nut Slots:
- Apply a small amount of lubricant, like graphite from a pencil or a specialized nut lubricant, in each nut slot. This can prevent string binding, which often causes tuning instability, especially with new strings.
- Set Pickup Height (Electric Guitars):
- Adjust pickup height to ensure a balanced sound across strings and optimal output. Pickup height too close to the strings can cause unwanted magnetic pull, which affects intonation, while pickups set too low may reduce volume and clarity.
- Re-check Tuning: New strings will settle over a few hours or days, so re-check tuning often after the initial restringing session.
By following these steps, your guitar will sound and feel great, enhancing both your playing experience and overall tone quality. Regular setups and string changes are essential parts of maintaining your guitar, ensuring that your instrument is always in top condition for practice, recording, or performance.
Conclusion
Restringing your guitar may seem intimidating at first, but with a bit of practice, it will become a quick and satisfying routine. Whether you’re playing an electric, acoustic, or classical guitar, proper string installation is key to getting the best tone, feel, and longevity out of your instrument. Taking the time to restring your guitar correctly ensures better playability, tuning stability, and a brighter sound.
With the steps outlined above, you’re well on your way to mastering the art of stringing a guitar. And remember - each time you change strings, you’re not just maintaining your instrument but also rediscovering its full tonal potential. So grab your new set of strings, and get ready to bring new life to your guitar!
Top Ranked Strings on Equipboard

$33.99 - $39.00
5.0 (3)
5.0 (3)

$47.00 - $64.99
4.0 (1)
4.0 (1)


About the authors
Juan Spinelli is a multi-instrumentalist musician, but more of a guitarist than anything else. Based in Buenos Aires, Argentina, he started playing at a very early age and learned various instruments such as flute, clarinet, percussion, didjeridoo, cavaquinho, bass and more. Today, he also works as a music producer and sound engineer, collaborating in several projects in his city and with artists from all over the world. Read more