
By Gear Experts
Table of Contents
Equipboard
Equipboard is the world's largest community of artists and their gear. Read our review process.
We are reader-supported. When you buy through links on our site, we may earn an affiliate commission. Learn more.
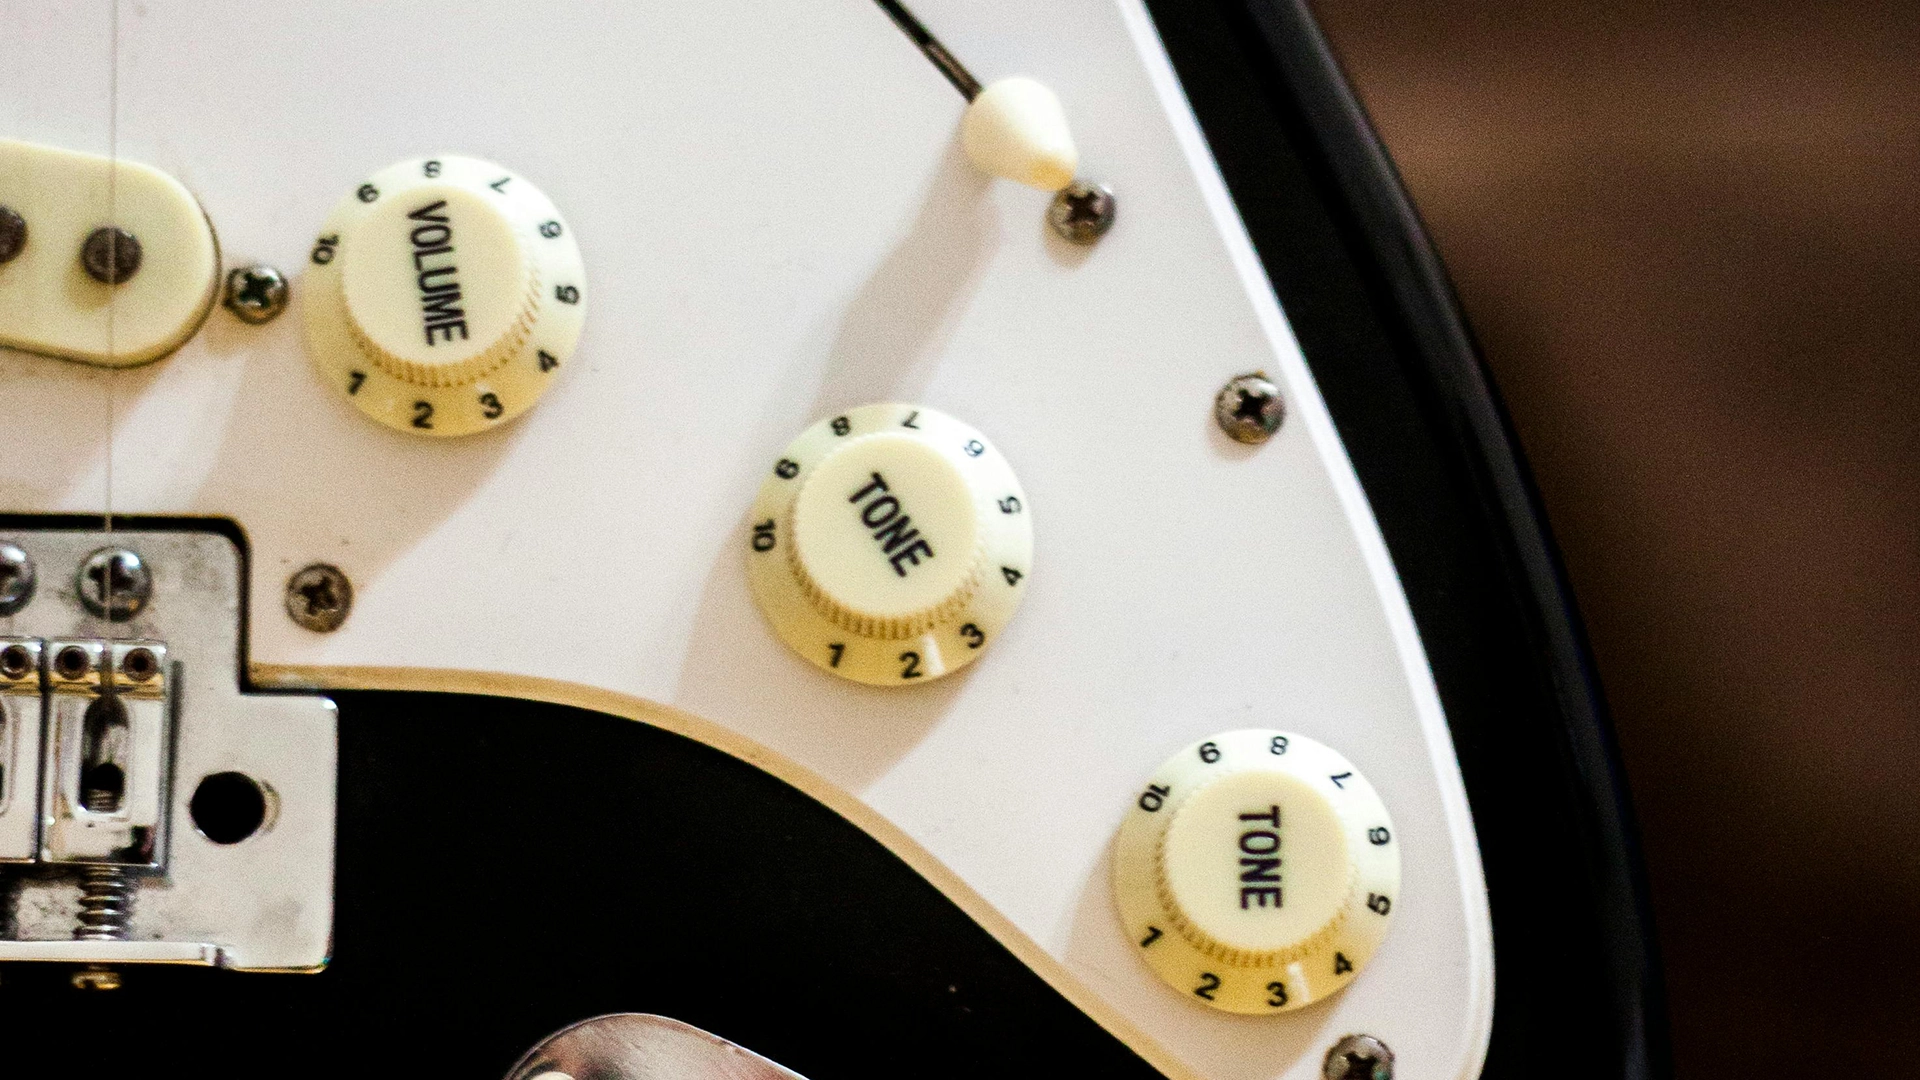
Every guitarist has been there: you're dialed into the perfect tone at full volume, your guitar singing with crystal-clear articulation and just the right amount of bite. Then you need to pull back the volume for a gentler passage or to blend better with the mix, and suddenly your instrument transforms into something completely different. That brilliant sparkle vanishes, replaced by a muffled, muddy sound that bears little resemblance to the tone you fell in love with just moments before.
If this scenario sounds painfully familiar, you've experienced the age-old problem of treble loss when rolling back your guitar's volume. It's a frustrating reality that has plagued guitarists for decades, but thankfully, there's a simple and elegant solution that can transform your playing experience: the treble bleed circuit.
This comprehensive guide will walk you through everything you need to know about treble bleed circuits. We'll explore why your tone gets muddy in the first place, examine the three main types of treble bleed modifications, help you choose the right circuit for your specific setup, and provide you with detailed installation instructions.
Why Your Tone Gets Muddy: The Basics of Volume Pots
Understanding why your guitar loses treble when you roll back the volume requires a quick dive into the world of guitar electronics, but don't worry. We'll keep things simple and practical.
The Culprit Behind Muddy Tone
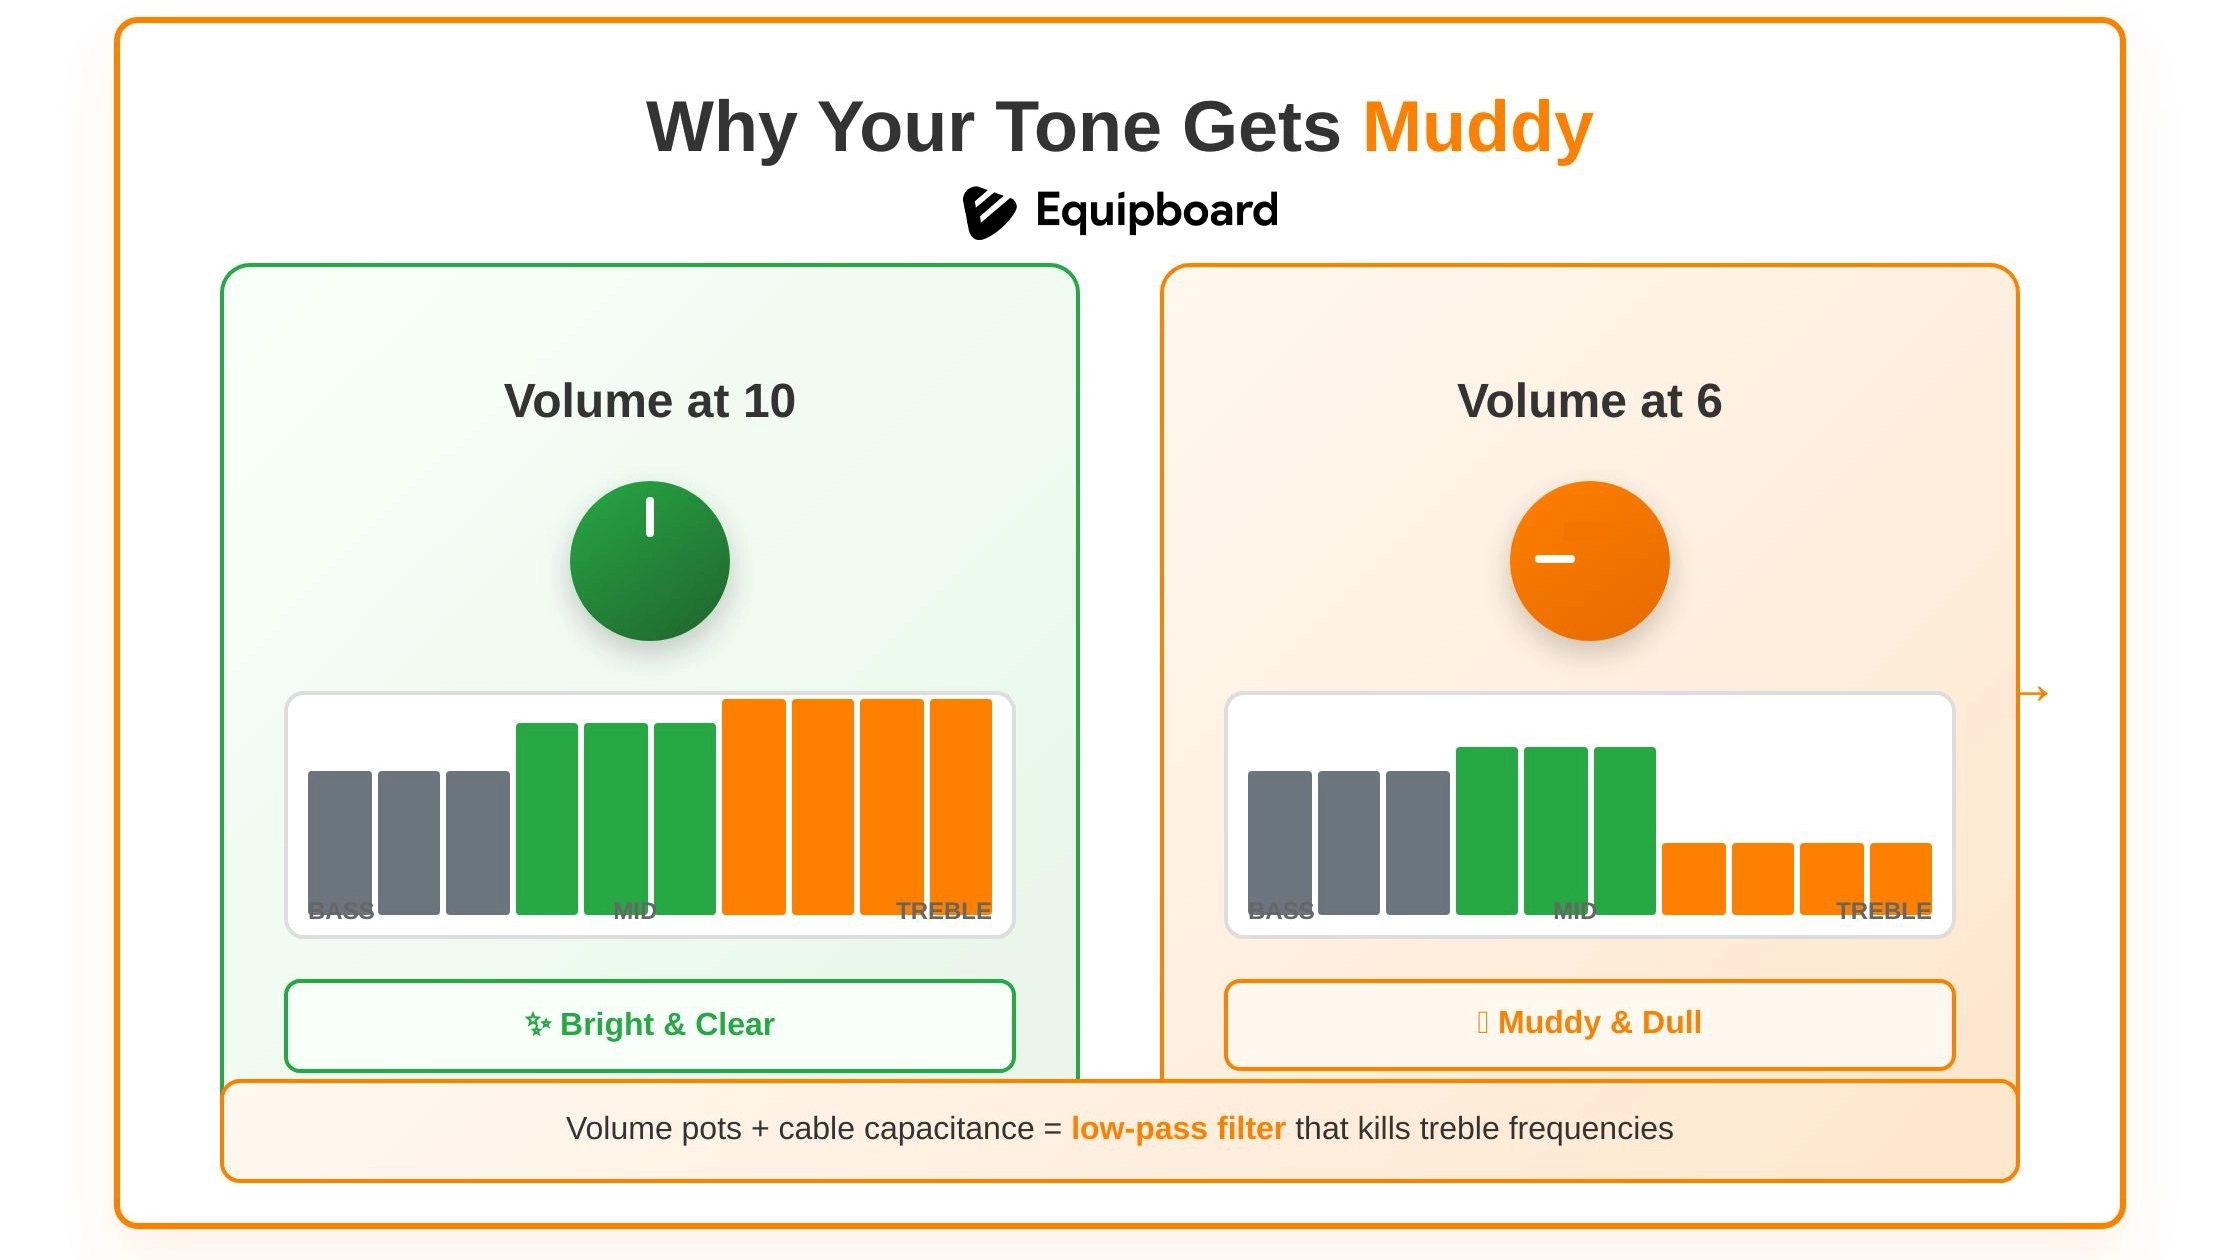
Your guitar's volume potentiometer (or "pot" for short) doesn't just control volume – it also acts as a low-pass filter that affects your instrument's frequency response. When you turn down your volume knob, you're not just reducing the signal level; you're also creating a circuit that allows low frequencies to pass through more easily while weakening the high frequencies that give your guitar its sparkle and clarity.
This happens because of the interaction between your volume pot's resistance and the natural capacitance present in your guitar's wiring and cable. Every guitar cable has inherent capacitance, typically ranging from 20 to 30 picofarads per foot. When combined with the resistance of your volume pot (usually 250k for single-coils or 500k for humbuckers), this creates what electronics folks call an RC (resistor-capacitor) low-pass filter.
How the Problem Gets Worse
The issue becomes more pronounced as you roll back your volume because you're effectively increasing the resistance in the circuit. Higher resistance combined with cable capacitance creates a more aggressive low-pass filter, which means even more treble frequencies get rolled off. This is why your tone sounds progressively muddier as you turn down the volume knob.
The Treble Bleed Solution
A treble bleed circuit works by providing a parallel path for high frequencies to bypass the volume pot's resistance. Think of it as creating a "treble highway" that allows those crisp, bright frequencies to maintain their presence even when the volume is rolled back. The circuit typically consists of a small capacitor, sometimes paired with a resistor, that connects across the input and output terminals of your volume pot.
When you install a treble bleed circuit, you're essentially preserving the frequency balance of your guitar's tone across the entire range of your volume control. This means you can achieve those sweet, rolled-back volume tones without sacrificing the clarity and definition that makes your guitar sound great at full volume.
Meet the Circuits: The 3 Types of Treble Bleed Mods
Now that you understand the problem and the basic solution, let's explore the three main approaches to treble bleed circuits. Each type has its own characteristics, benefits, and ideal applications.
Capacitor-Only Circuit
The simplest treble bleed modification uses just a single capacitor connected across the volume pot's input and output terminals. This straightforward approach has been around for decades and remains popular among guitarists who prefer minimalist modifications.
How It Works
The capacitor-only circuit allows high frequencies to pass through while the volume pot attenuates the overall signal. Typical capacitor values range from 470 picofarads to 2200 picofarads, with 1000pF being a common starting point for most guitars. The smaller the capacitor value, the less treble bleed effect you'll hear, while larger values provide more pronounced high-frequency preservation.
Strengths and Limitations
This circuit excels in its simplicity and effectiveness for basic treble preservation. It's easy to install, requires minimal components, and provides a noticeable improvement over stock wiring. However, the capacitor-only approach can sometimes sound a bit harsh or shrill, especially with higher-output pickups or when using larger capacitor values. Some guitarists find that while it preserves treble, it doesn't maintain the natural tonal balance as effectively as more complex circuits.
Best Applications
The capacitor-only treble bleed works particularly well with vintage-style single-coil pickups and lower-output humbuckers. It's an excellent choice for guitarists who want a simple, reversible modification that provides basic treble preservation without getting too deep into component selection and fine-tuning.
Capacitor and Resistor in Parallel
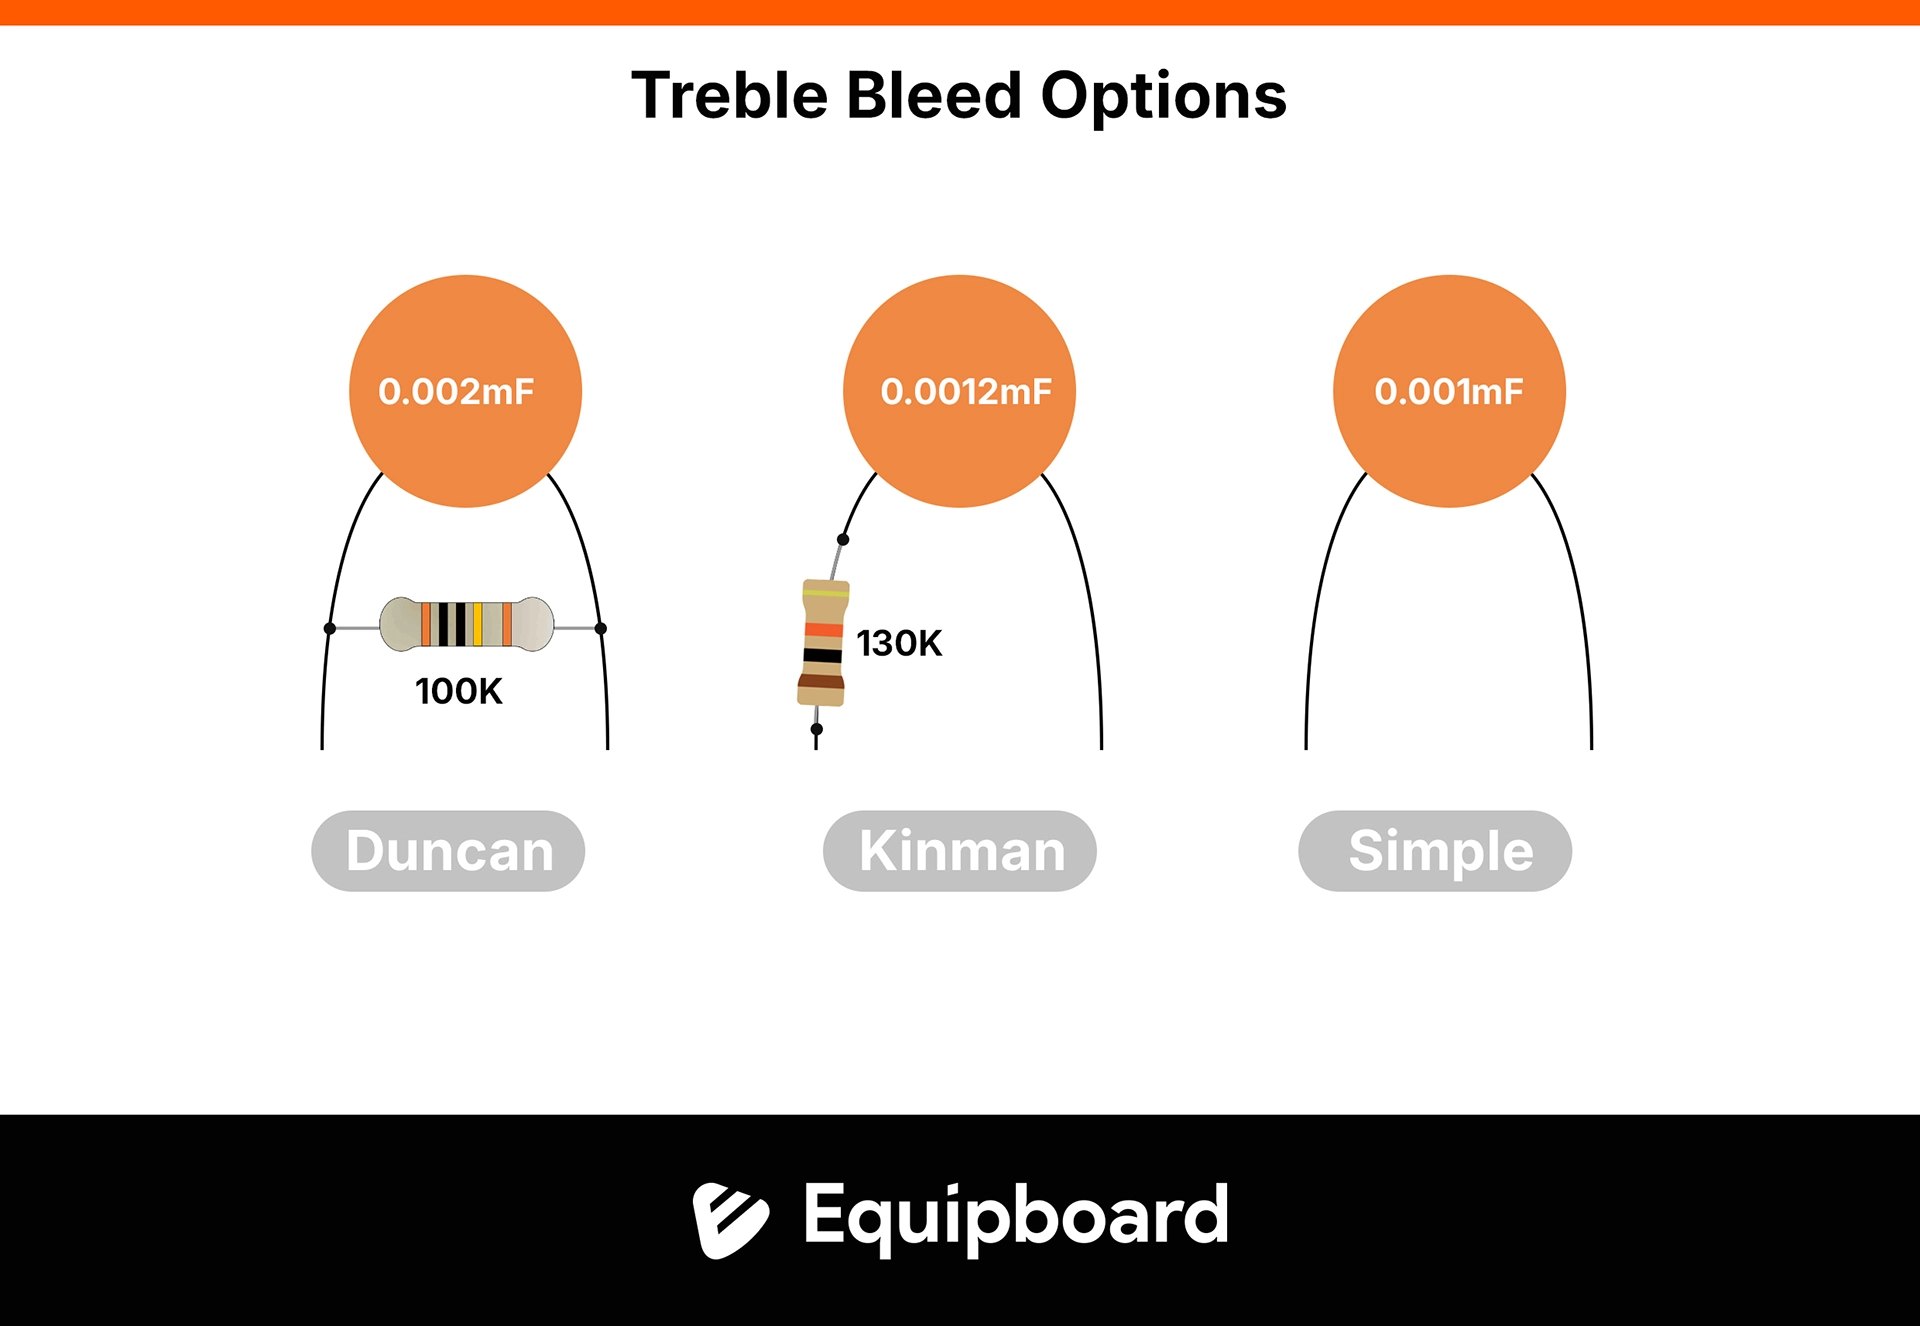
The parallel configuration pairs a capacitor with a resistor, both connected in parallel with each other and then across the volume pot terminals. This approach, popularized by Seymour Duncan and many other pickup manufacturers, offers more refined control over the treble bleed effect.
The Parallel Advantage
By adding a resistor in parallel with the capacitor, you create a circuit that not only preserves treble but also maintains a more natural frequency response across the spectrum. The resistor helps prevent the harsh, overly bright character that can sometimes plague capacitor-only circuits. Common combinations include a 2200pF capacitor with a 150k ohm resistor, though values can be adjusted to taste.
Tonal Characteristics
This configuration tends to produce a smoother, more musical treble bleed effect. The parallel resistor acts as a frequency-dependent attenuator that helps maintain the overall tonal balance while still preserving clarity. Many guitarists find this approach provides the most natural-sounding rolled-back volume tones, especially when properly matched to their guitar and playing style.
Ideal Scenarios
The parallel configuration works exceptionally well with higher-output pickups and guitars that tend to sound overly bright with simple capacitor-only circuits. It's particularly effective in humbucker-equipped guitars and instruments with naturally bright-sounding woods or hardware. This circuit type offers excellent versatility and can be fine-tuned by adjusting either the capacitor or resistor values.
Capacitor and Resistor in Series
The series configuration connects the capacitor and resistor one after the other, creating a different type of frequency response than the parallel approach. This method, often associated with Chris Kinman's designs, provides yet another flavor of treble preservation.
Series Circuit Behavior
In the series configuration, the capacitor and resistor work together to create a more gradual frequency response curve. The resistor limits the amount of signal that can pass through the capacitor, preventing excessive brightness while still maintaining treble clarity. Typical values might include a 1000pF capacitor in series with a 100k ohm resistor, though experimentation is key to finding the sweet spot.
Unique Tonal Qualities
The series approach often produces the most subtle and refined treble bleed effect. It tends to preserve treble frequencies without adding the sometimes artificial brightness that can occur with other circuit types. Many guitarists describe the series configuration as providing the most "vintage-correct" sound when rolling back the volume, maintaining the natural character of the instrument.
When to Choose Series
This configuration works particularly well with vintage-style guitars and pickups where maintaining authenticity is important. It's also an excellent choice for guitarists who want treble preservation but prefer a more understated effect. The series circuit is ideal for instruments that already have good natural brightness and just need a subtle helping hand to maintain clarity at lower volumes.
Choosing the Right Circuit for Your Setup
Selecting the optimal treble bleed configuration depends on several factors related to your guitar, pickups, and personal tonal preferences. Understanding these variables will help you make an informed decision that enhances rather than compromises your instrument's voice.
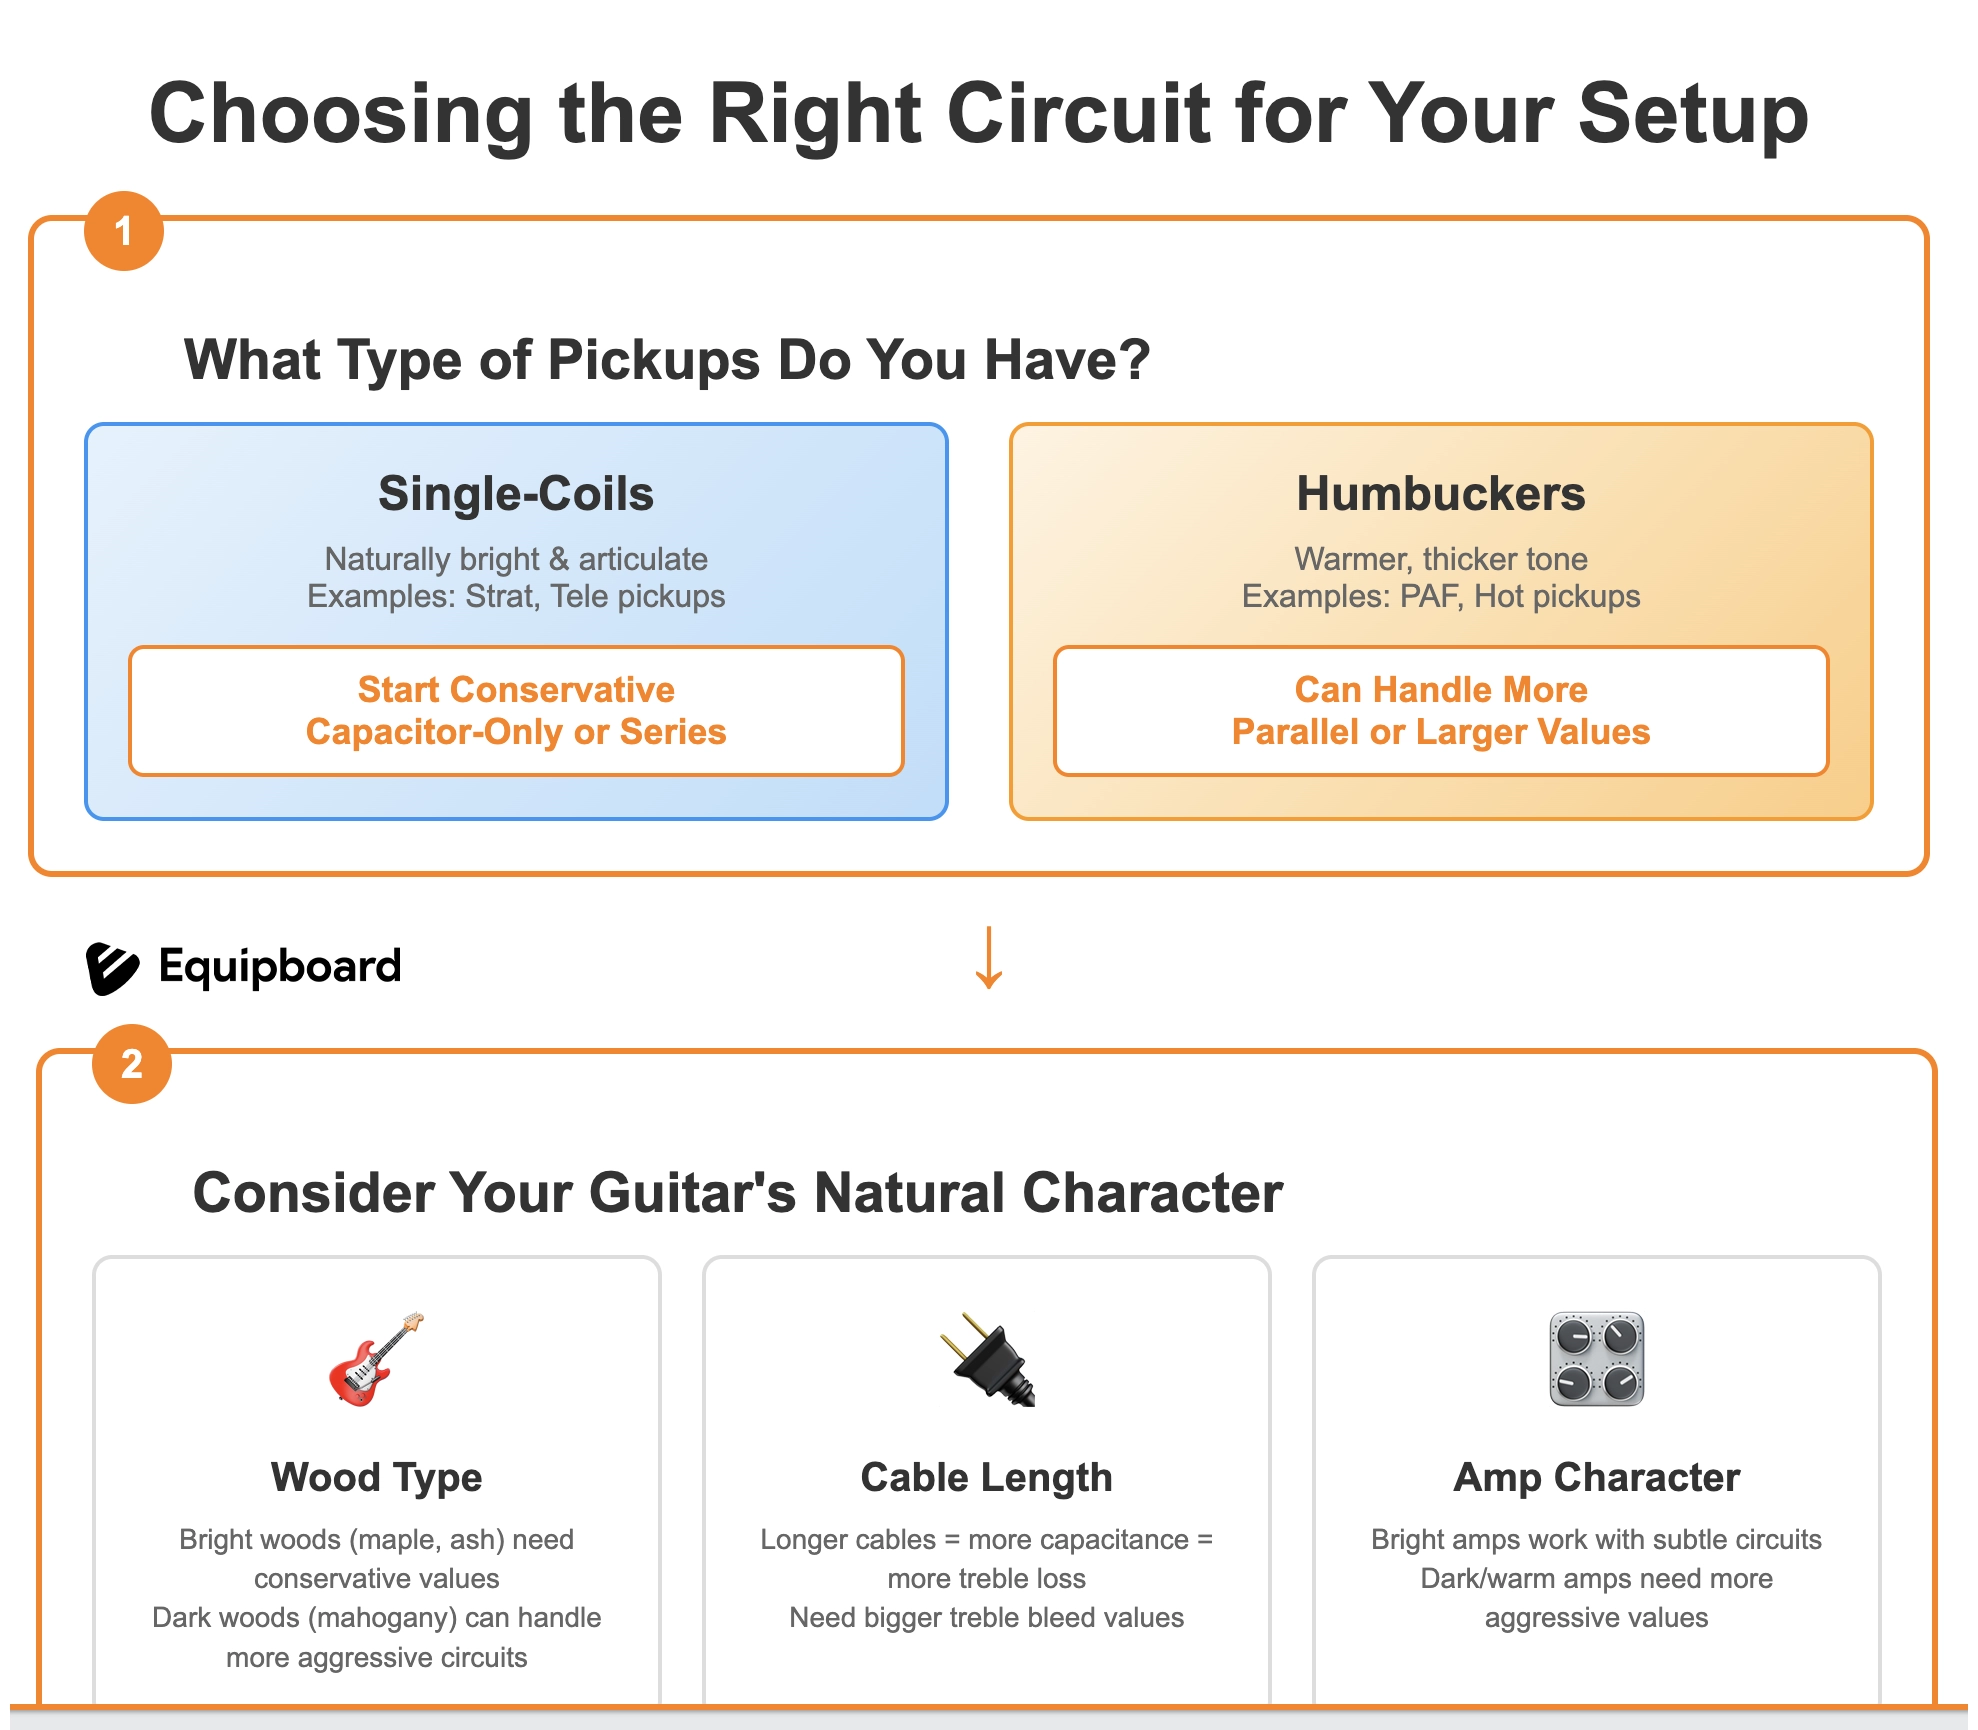
Pickup Type Considerations
Single-coil pickups, with their naturally bright and articulate character, often pair well with simpler circuits or more conservative component values. The inherent clarity of single-coils means they typically don't need aggressive treble preservation to maintain their sparkle.
Humbuckers, on the other hand, tend to have a warmer, thicker tone that can benefit from more pronounced treble bleed effects. Higher-output humbuckers especially can handle larger capacitor values or more complex circuits without becoming overly bright.
Component Value Trade-offs
Smaller capacitor values (470pF to 1000pF) provide subtle treble preservation that maintains naturalness while preventing muddiness. These values work well with bright guitars or when you want a more conservative approach.
Larger capacitor values (1500pF to 2200pF) offer more aggressive treble preservation but risk making your rolled-back volume tones sound artificially bright. These values can work well with darker-sounding guitars or humbuckers that need extra help maintaining clarity.
When using resistors in your treble bleed circuit, lower values (47k to 100k ohms) provide more dramatic effects, while higher values (150k to 220k ohms) create more subtle, refined results. The key is finding the balance that complements your specific guitar and pickup combination.
Guitar-Specific Factors
Instruments with naturally bright woods like maple or ash might benefit from more conservative treble bleed circuits to avoid excessive brightness. Guitars with warmer-sounding woods like mahogany or basswood can typically handle more aggressive treble preservation.
The age and condition of your guitar's electronics also matter. Older instruments with worn potentiometers or vintage-style cloth wiring might respond differently to treble bleed circuits than modern guitars with pristine electronics. Sometimes the natural aging of components creates its own form of treble roll-off that needs to be considered.
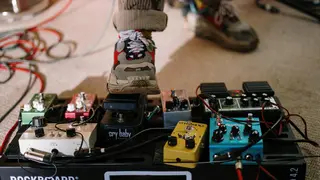
Amplifier and Effects Interactions
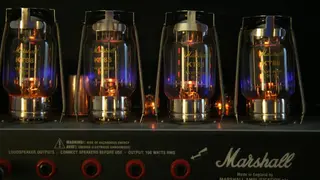
Tube amplifiers with their natural compression and harmonic saturation often complement treble bleed circuits beautifully, as the preserved treble frequencies interact with the amp's natural characteristics to create pleasing overtones.
High-gain amplifiers or heavy distortion effects can sometimes make treble bleed circuits sound too aggressive, as the preserved high frequencies get amplified and distorted along with the rest of the signal. In these situations, more conservative circuit values or the series configuration might be preferable.
Clean amplifier settings, conversely, often benefit from more pronounced treble bleed effects since there's no natural compression or saturation to smooth out the frequency response.
Quick Selection Guide
| Your Guitar Setup | Playing Style | Current Volume Roll-Back Issue | Recommended Solution |
|---|---|---|---|
| Single-coils, bright amp, short cables | Clean/edge-of-breakup tones | Slight muddiness, still usable | No treble bleed needed |
| Vintage single-coils, long cables | Clean jazz, blues rhythm | Noticeable treble loss | Capacitor-only (1000pF) |
| Hot single-coils, tube amp | Rock, country lead | Significant muddiness | Series circuit (1000pF + 100k) |
| PAF-style humbuckers | Classic rock, blues | Tone becomes too dark | Parallel circuit (2200pF + 150k) |
| High-output humbuckers | Metal, high-gain rock | Complete treble loss | Parallel circuit (1500pF + 100k) |
| Dark-sounding guitar/amp combo | Any style | Extreme muddiness | Capacitor-only (2200pF) |
| Naturally bright guitar | Fingerstyle, acoustic-like tones | Minor treble loss | Series circuit (470pF + 150k) |
Installation Guide: DIY Treble Bleed Workshop

Installing a treble bleed circuit is one of the most straightforward guitar modifications you can perform, requiring basic soldering skills and minimal tools. With proper preparation and careful attention to detail, most guitarists can complete this modification in under an hour.
Tools and Materials Checklist
Before starting your installation, gather all necessary tools and materials to ensure a smooth process. You'll need a soldering iron (25-40 watts is ideal for guitar electronics), rosin-core solder (60/40 or 63/37 composition works well), wire strippers, small needle-nose pliers, and a multimeter for testing connections.
For materials, you'll need your chosen capacitor and resistor (if using a circuit that requires one), and some hookup wire if you plan to extend connections. High-quality components make a difference in both sound and longevity, so consider investing in premium capacitors like polystyrene or polypropylene types for best results.
Safety equipment is equally important. Ensure you have adequate ventilation for soldering fumes, good lighting for detailed work, and a stable work surface. A guitar neck support can help secure your instrument during the modification process.
Preparation and Planning
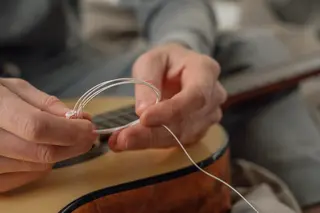
Start by removing the strings from your guitar and carefully removing the back cover or pickguard to access the volume potentiometer. Take photos of the existing wiring before making any changes. This documentation will be invaluable if you need to troubleshoot or reverse the modification later.
Identify the input and output terminals of your volume pot. The input terminal connects to your pickup selector switch or directly to your pickups, while the output terminal connects to your output jack. Most volume pots have three terminals: the input, output, and ground connection to the pot's case.
Before committing to permanent connections, consider testing your chosen circuit with alligator clips. This allows you to hear how the modification affects your tone and make component value adjustments before soldering everything in place. While this means that you will have to unstrung the guitar, connect the clips to the volume pot and then find a way to restring the guitar, it will ensure that you are fully aware of how your guitar’s tone will change before making any permanent modifications.
Step-by-Step Installation Process
Begin by heating your soldering iron and preparing your work area. Clean the terminals of your volume pot with fine sandpaper or steel wool to ensure good solder adhesion. Tin the terminals lightly with solder to make the final connections easier and more reliable.
For a capacitor-only circuit, simply solder one lead of the capacitor to the input terminal of the volume pot and the other lead to the output terminal. The orientation doesn't matter with non-polarized capacitors, which are what you'll typically use for treble bleed circuits.
If you're installing a parallel configuration (capacitor and resistor in parallel), you can either connect both components directly to the pot terminals or create a small parallel assembly first and then connect it to the pot. The latter approach often results in neater, more organized wiring.
For series configurations, connect one end of the capacitor to the input terminal, then connect the resistor between the other end of the capacitor and the output terminal. This creates the series path that both components must share.
Testing and Fine-Tuning
After completing your installation, reassemble your guitar enough to test the modification. Plug into your amplifier and test the volume control across its entire range, paying attention to how the tone character changes as you roll back the volume.
If the effect is too subtle, you might need a larger capacitor value or different resistor value depending on your circuit type. If the rolled-back volume tones sound too bright or harsh, consider smaller component values or switching to a different circuit configuration.
Fine-Tuning and Experimentation Tips
Every guitar is unique, and finding the perfect treble bleed setup often requires some experimentation and fine-tuning.
Component Value Experimentation
Start with commonly recommended values as your baseline, but don't be afraid to experiment. Keep a small collection of different capacitor values (470pF, 1000pF, 1500pF, 2200pF) and resistor values (47k, 100k, 150k, 220k ohms) for testing purposes. Small changes in component values can produce surprisingly significant differences in tone and feel.
Try the same circuit type with different component values to understand how each variable affects your guitar's response. You might discover that your particular instrument responds best to non-standard combinations.
Pickup Position Considerations
Different pickup positions in your guitar might benefit from different treble bleed approaches. Some guitarists install treble bleed circuits only on their bridge pickup volume control, as this pickup position tends to sound brightest and can handle more aggressive treble preservation.
Others prefer to match all volume controls with identical treble bleed circuits for consistency across pickup positions. Experiment with both approaches to determine what works best for your playing style and musical preferences.
Pre-Wired Options for Beginners
If you're hesitant about soldering or component selection, several manufacturers offer pre-wired treble bleed assemblies that take the guesswork out of the modification. These typically come with tested component combinations and clear installation instructions.
While pre-wired options might cost slightly more than individual components, they provide peace of mind for beginners and eliminate the trial-and-error process of finding the right component values. Many experienced guitarists also use pre-wired assemblies as starting points for further customization.
Recording Your Discoveries
Keep detailed notes about your experimentation process, including component values, installation dates, and tonal observations. Document how different settings interact with various amplifiers, effects, and playing techniques. This information becomes invaluable when working on future guitar modifications or helping other guitarists with similar setups.
Consider recording audio samples of your guitar with different treble bleed configurations. These recordings can help you make more objective comparisons and serve as references when fine-tuning other instruments.
Community Engagement and Sharing
Participate in online forums, social media groups, or local guitar communities where you can share your discoveries and learn from other players' experiences.
Many guitarists have found their perfect treble bleed setup through recommendations from other players with similar instruments or musical styles. Don't hesitate to ask questions or share your own successful combinations with others who might benefit from your discoveries.
Conclusion: Unlock Your Guitar's Full Potential
Installing a treble bleed circuit is one of the most cost-effective and impactful modifications you can make to your guitar. For the price of a few small components and an hour of your time, you can transform how your instrument responds across its entire volume range, opening up new tonal possibilities and playing techniques that were previously compromised by treble loss.
The three circuit types we've explored each offer their own advantages and character. Whether you choose the simplicity of a capacitor-only circuit, the refined balance of parallel components, or the subtle elegance of a series configuration, you're taking a significant step toward optimizing your guitar's performance.
Remember that the perfect treble bleed setup is highly personal and depends on your guitar, playing style, and tonal preferences. Don't be discouraged if your first attempt doesn't yield perfect results. Fine-tuning and experimentation are part of the journey toward discovering your ideal tone.
For first-time modifiers, take confidence in knowing that treble bleed installation is a **reversible, low-risk modification. If you can solder a few connections, you have the skills necessary to complete this upgrade successfully.
Whether you're chasing vintage tones, modern clarity, or something uniquely your own, a properly installed treble bleed circuit brings you one step closer to that ideal sound that exists in your head.
Top Ranked Parts on Equipboard
-m.webp?v=1784905234)

$81.00 - $109.00
5.0 (79)
5.0 (79)

-m.webp?v=1784905251)

About the authors
Michael R. Pierce is the co-founder of Equipboard and a lifelong musician with over 25 years of experience as a guitarist and gear enthusiast. He blends solid music theory chops (thanks to formal training in guitar, piano, and trumpet) with real-world experience, always exploring and experimenting across genres like rock, blues, and hip-hop. Michael launched Equipboard in 2013 after graduating from The University of Texas at Austin, leveraging his unique blend of musical passion, technological acumen, and community building. His current go-to rig features a Fender American Original ‘50s Telecaster, Analogman King of Tone, Strymon Flint, and a Fender ‘57 Custom Champ. Read more


.webp)